Powered By

Powered by Blogger

Selasa, 30 November 2010

Synapse Is Here: A New Semantic Launcher That Makes Use Of The Zeitgeist Engine

Synapse

Synapse?

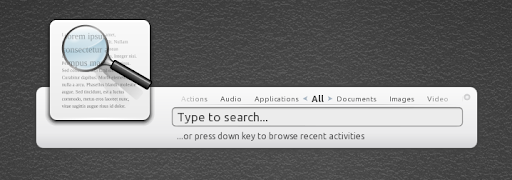
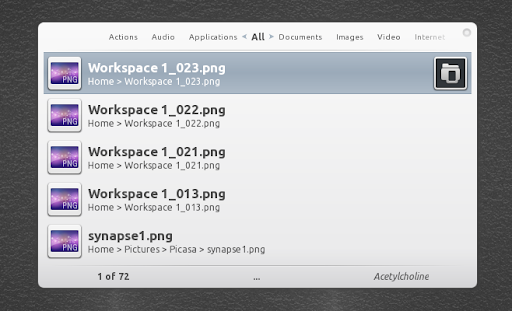
Michal Hruby, one of the main AWN developers has just announced the release of a new application called Synapse (codename "Acetylcholine"). Synapse is a semantic launcher written in Vala that you can use to start applications as well as find and access relevant documents and files by making use of the Zeitgeist engine:

Currently the development was focused primarily around using Zeitgeist for the searches, and there are even plugins that process the output from the Zeitgeist plugin and either try to improve the results, or find similar files on the filesystem (for example the Hybrid search plugin). Still, all of the functionality is based on plugins, so further development can lead anywhere.

- Michal Hruby, the main Synapse developer


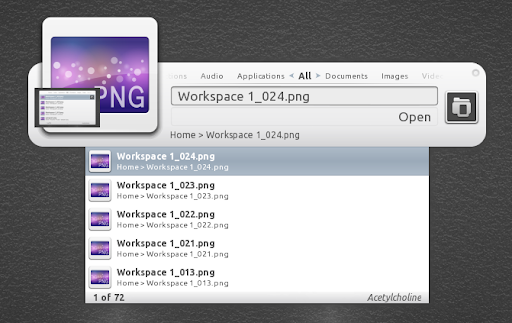
You'll probably think "Gnome Do" when you first see the screenshots but it actually doesn't have anything to do with Gnome Do except the purpose (obviously) and the fact that it looks amazing!


For such a great application, a video is a must so here's one I've just recorded (just a quick overview):
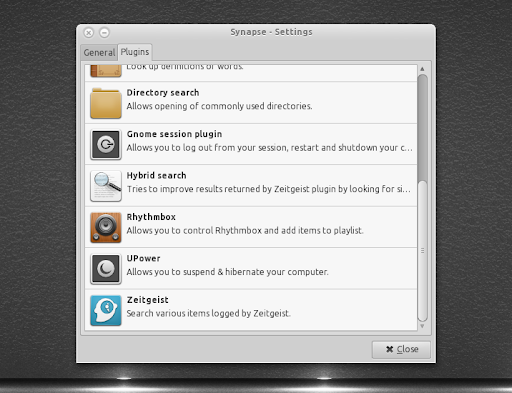


Plugins

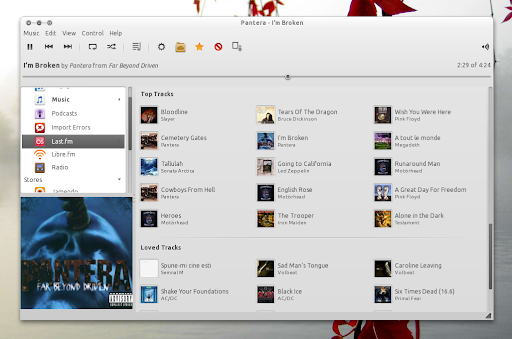
Synapse already features quite a few plugins which allow you to control Rhythmbox or Banshee, execute commands, look up dictionary words, open commonly used directories, suspend and hibernate your computer and a very interesting "hybrid search" plugin which tries to improve results returned by the Zeitgeist plugin by looking for similar files on the filesystem.

Synapse plugins

synapse plugins

Themes

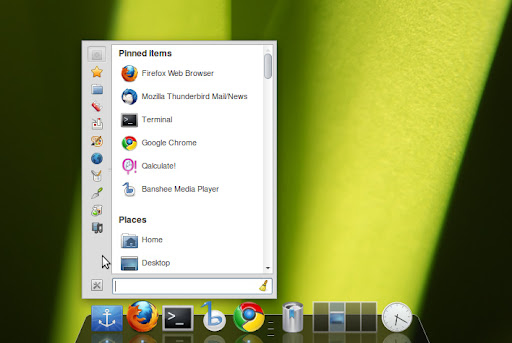
Besides the default theme, Synapse comes with 3 other themes: Mini, Virgilio and Dual:

Synapse mini theme
(Synapse - Mini theme)


Synapse Virgilio theme
(Synapse - Virgilio theme)


Synapse virgilio theme
(Synapse - Dual theme)


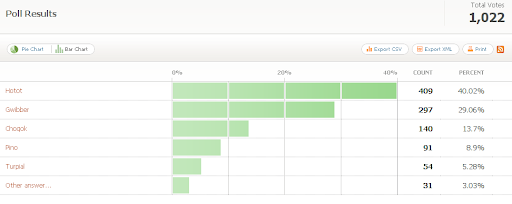
I personally love all these themes. But let's hear it from you: which one do you like the most?


Install Synapse in Ubuntu


Synapse comes with an Ubuntu Lucid and Maverick PPA so to install Synapse in Ubuntu, use the following commands:
sudo add-apt-repository ppa:synapse-core/ppa
sudo apt-get update
sudo apt-get dist-upgrade #required for Lucid only
sudo apt-get install synapse

If you're not using Ubuntu, get the source code @ Launchpad.


Then run Synapse via Applications > Accessories. Once the application is running, summon it using the CTRL + SPACE keys (this can be changed in the Synapse settings).


Since Synapse uses Zeitgeist dataproviders it means the more Zeitgeist dataproviders you have, the more info Synapse will return. In Maverick, you can add the Zeitgeist PPA (it's not a must, but it's a plus) and install some more data providers:
sudo add-apt-repository ppa:zeitgeist/ppa
sudo apt-get update
sudo apt-get install zeitgeist-datasource-bzr zeitgeist-datasource-emacs zeitgeist-datasource-eog zeitgeist-datasource-geany zeitgeist-datasource-gedit zeitgeist-datasource-rhythmbox zeitgeist-datasource-totem zeitgeist-datasource-vim

You can exclude some dataproviders in the last command above if you don't use those applications.


For the "full experience", you'll also want the FTS Zeitgeist extension (it has a different name so I'll post separate instructions for Lucid and Maverick):

- Maverick
sudo apt-get install zeitgeist-fts-extension

- Lucid (you need to add the Zeitgeist PPA first - see above):
sudo apt-get install zeitgeist-extension-fts


Want an application to provide results for Synapse?

The easiest way to do that would be to push data to Zeitgeist (or at least to recently-used) and you've got Synapse integration for free. If you need something more complex, we'll welcome your plugin.


Found a bug? Report it @ Launchpad: https://bugs.launchpad.net/synapse-project/+filebug


Note: for the Rhythmbox recent tracks to work, you need the Rhythmbox Zeitgeist plugin available in the latest Rhythmbox 0.13.2 in the Rhythmbox WebUpd8 PPA (Maverick only).


[via ~mhr3]

Install Google Earth 6 In Ubuntu / Linux [With Fixes]

Google Earth 6 linux

Google Earth 6 has been released yesterday (see what's new HERE), however it's quite difficult to install / run it under Linux due to some errors. But here are exact installation instructions which should get Google Earth 6 to install and run in Linux.


Update: this was posted when there were no .deb packages available for Google Earth 6. Now all you have to do is download the .deb from http://www.google.com/earth/index.html.

1. Ubuntu (and other Debian-based Linux distributions):


Before proceeding, make sure you have the Multiverse repository added.


1.1) If you would try install Google Earth 6 without installing the lsb-core package, you would get an error like this when running it:

exec: 50: ./googleearth-bin: not found

Or:
googleearth: command not found


So let's install lsb-core:
sudo apt-get install lsb-core


1.2) Install Google Earth package which will automatically create a Google Earth .deb

32bit:
sudo apt-get install googleearth-package
cd && make-googleearth-package --force

64bit:
sudo apt-get install googleearth-package ia32-libs
cd && make-googleearth-package --force

1.3) The last command above will create a Google Earth .deb file (it's called /googleearth_6.0.0.1735+0.5.7-1_i386.deb on my system) which should be available in your home folder. Install it like you install any other .deb.

Now Google Earth 6 should work.


2. Manual installation (for any Linux distribution, including Ubuntu)


2.1) To get Google Earth 6 to start, you need to install lsb-core. In Ubuntu, install it like this
sudo apt-get install lsb-core

2.2) Download the latest Google Earth 6 (.bin) and place it in your home folder.

2.3) Then run the following commands:

cd
chmod +x GoogleEarthLinux.bin
./GoogleEarthLinux.bin --target /tmp/ge

2.4) At this point, you'll get an error like this:

./GoogleEarthLinux.bin
Verifying archive integrity... All good.
Uncompressing Google Earth for GNU/Linux 5.1.3533.1731...............................................................
setup.data/setup.xml:1: parser error : Document is empty

^
setup.data/setup.xml:1: parser error : Start tag expected, '<' not found

^
Couldn't load 'setup.data/setup.xml'

But don't worry, we'll fix it using the commands below:
cd /tmp/ge/setup.data/bin/Linux/x86/
mv setup.gtk setup.gtk2
cd /tmp/ge
sudo ./setup.sh


Notes: I've only tested the first method (on 32bit only!), but the second one should work too.


Now, Google, please make your applications work without going through so much trouble!


Thanks to petepetepete and EAGR for the fixes.

Senin, 29 November 2010

Gnome Shell Overview-Relayout Branch, Merged Into The Master Branch [Screenshots]

The Gnome Shell overview relayout has been merged into the master branch. That means it is now officially part of Gnome Shell. Unfortunately, it doesn't include any elements from the Tiled View mockups we've seen a few days ago but it's probably too soon for that.

I couldn't record a video because every time I try to make a Gnome Shell screencast I end up with a 80% blue screen video, but here are some screenshots I took a few minutes ago:

Activities view:

Gnome shell

The launcher / application switcher on the left is only available in the Activities view.


Moving your mouse to the right edge of the screen will bring up the controls to add/remove workspaces.


Right clicking an application:

Gnome Shell screenshot


Applications view:

Gnome shell applications

Even though there's a search box, the applications could really use some categories to be organized into.


Right now, switching desktops just doesn't feel right as the desktops overview is not available anymore (so you can't see all the desktops at once). Hopefully the Tiled View will be included soon as Gnome Shell still lacks in usability.


If you want to try out Gnome Shell yourself, I've updated the instructions in our Install Gnome Shell (From GIT) In Ubuntu 10.10 Maverick Meerkat post.

Ubuntu 11.04: Network Manager Finally Gets AppIndicator Support

Network Manager appindicator

Even though there was already work for getting ConnMan in Ubuntu (since 10.10), an update today in Ubuntu 11.04 Natty Narwhal brings appindicator support for the Network Manager applet (you can see the changelog here). This is very important since Ubuntu will ditch the notification area soon, therefore the connection manager has to use an indicator applet.

But what about ConnMan? Unfortunately I didn't find any info on it, but I'll let you know if something comes up.


Update: here's some info on ConnMan from Mathieu Trudel-Lapierre, who's behind appindicator support in NM:

The long term plan is to switch to Connman and indicator-network, but changes in unity and the desktop make it so that it's really important to get a version of nm-applet that still shows up on the desktop with unity, given that the new compiz-based Unity doesn't currently implement the system tray


Thanks to Daniel Rodrigues!

CLI Companion Reaches Version 1.0 RC2

Cli companion

CLI Companion is a tool aimed at making the terminal easier to use: it's a GUI that displays a list of commands and an embedded terminal under it. The application comes with a list of commonly used commands by default, each having a short description and if you want to find out more about a certain command, simply right click it and select "Help". This will display the "man" (manual) for the selected command. But CLI Companion can help advanced users too as you can use it to store long commands which you can then easily find using the search feature.


CLI Companion 1.0 RC2 has been released today, bringing 2 features designed to make CLI Companion more useful as a daily terminal:

  • the command list can now be collapsed and expand as needed (see screenshot below)
  • The format commands are stored in has been changed. Commands requiring User Input when ran now use question marks(?) as place holders. So a command like 'ls /any/directory' would be added to your command list as 'ls ?'. This changed was required because the old behavior only allowed user input at the end of the command.


Cli companion screenshot

To install the latest CLI Companion 1.0 RC2 in Ubuntu (Karmic, Lucid or Maverick), use the following commands:
sudo add-apt-repository ppa:clicompanion-devs/clicompanion-nightlies
sudo apt-get update
sudo apt-get install clicompanion

You'll then find CLI Companion under Applications > Accessories.

Fix HDA Intel (Realtek ALC887) No Sound Issue In Ubuntu 10.10 Maverick Meerkat

I got a new computer at work, installed Ubuntu 10.10 Maverick Meerkat and the sound didn't work. The fix was actually quite simple so I thought I'd share it with you in case you have a similar issue.

The computer has an HDA Intel chip (Realtek ALC887) and I couldn't open alsamixer (this error was displayed: "load hw:0 error: Invalid argument"), although the sound seemed to be working in various applications (no error there) except I couldn't hear anything.

The fix:

Edit /etc/modprobe.d/alsa-base.conf:
sudo gedit /etc/modprobe.d/alsa-base.conf

And add the following line:
options snd-hda-intel model=generic

Save, reboot (a logout might be enough too) and the sound should work. If this generic fix doesn't work for you, see THIS post.

Minggu, 28 November 2010

VideoLan Movie Creator (VLMC) Gets Video Effects [PPA]

VLMC VideoLan Movie Creator

VLMC (VideoLan Movie Creator) is a new video editor, currently in alpha, built by the VLC developers.

Did you know we maintain a daily builds VLMC PPA? I bet most of you forgot because we haven't published anything about it in a while. The development is quite slow, but something very exiting landed in VLMC recently: video effects.

Update: The latest VLMC makes use of frei0r-plugins, a simple cross-platform framework for video effects that provides filters, mixers and generators by means of minimalistic plugin API. That means that the effects might have been available in VLMC for a while but I didn't notice this until now. The effects include 3dflippo, baltan, color distance, edgeglow, luminance, transparency, vertigo, water and lots more.


Install VLMC in Ubuntu 10.10 Maverick Meerkat

Unfortunately the Lucid builds are not working as I need a stable VLC 1.1.x PPA for Lucid to use for building VLMC, but to install it in Maverick you can use our daily builds PPA - don't worry, it won't break anything as the PPA only has VLMC.

To add the VLMC daily builds PPA and install VLMC in Ubuntu 10.10 Maverick Meerkat, use the following commands:
sudo add-apt-repository ppa:webupd8team/vlmc
sudo apt-get update
sudo apt-get install vlmc frei0r-plugins


Please note that VLMC is still in alpha, so expect to find a lot of bugs!

Sabtu, 27 November 2010

Cardapio Menu Update Brings Docky Helper, Minimode

Cardapio, one of the best main menu applets available for Linux has just been updated, bringing some very cool new features:


Cardapio minimode
(Cardapio Gnome panel applet - minimode)


Minimode is a new option to reduce the size of the Cardapio main window which saves a lot of space, very useful for netbooks (but not only).


Cardapio Docky
(Cardapio running as a Docky Helper)


Docky Helper: clicking the anchor icon in Docky will open Cardapio.


Other changes in the latest Cardapio include reduced memory usage and the search box is now sensitive to Cardapio's location (if Cardapio is launched from the top panel, the search box is on top and if Cardapio is launched from the bottom panel, the search box is at the bottom).


Install Cardapio in Ubuntu


To install the latest Cardapio in Ubuntu, use the following commands (will add the PPA and install Cardapio):
sudo add-apt-repository ppa:cardapio-team/unstable
sudo apt-get update
sudo apt-get install cardapio

Once installed, right click a Gnome panel, select "Add to panel" and add Cardapio.


To also install the Cardapio Docky helper, use the following command:
sudo apt-get install cardapio-docky


Thanks to Thiago Teixeira for the tip! Docky Cardapio image credits: tvst3000 (as I don't use Docky)

Y PPA Manager 0.0.2 Adds Linux Mint Support

y ppa manager

Y PPA Manager is a project I work on in my spare time. It's a GUI tool to add, remove, purge, list and search for Launchpad PPAs. For more info on Y PPA Manager, check out this post: Y PPA Manager: Easily Search, Add, Remove Or Purge PPAs In Ubuntu.

Today I've released a new version which fixes some bugs and brings Linux Mint support (thanks to Matthew Markell for the help!) for all the Y PPA Manager tools.


If you didn't try Y PPA Manager yet, here is a video I've recorded, demoing the PPA search feature (which can list the packages - including their versions in a PPA, download .debs from a PPA and so on):


Install Y PPA Manager in Ubuntu and Linux Mint

Add the Y PPA Manager PPA and install it using the following commands (available for Ubuntu Karmic, Lucid, Maverick and Natty and Linux Mint: Helena, Isadora and Julia):
sudo add-apt-repository ppa:webupd8team/y-ppa-manager
sudo apt-get update
sudo apt-get install y-ppa-manager

Once installed, you can find Y PPA Manager under Applications > System tools.


Remember to submit any bugs you may find @ Launchpad.

Ubuntu 11.04 Natty Narwhal Update Finally Sets Unity Default (For Desktop) [Video]

Unity (which now shows up as a plugin in CompizConfig Settings Manager) has finally been made default in Ubuntu (desktop) 11.04 Natty Narwhal yesterday, as you can see in the Ubuntu meta changelog. That means that if you download the latest Ubuntu 11.04 Natty Narwhal daily build and boot from it, you should get Unity without having to install / enable anything. The same changelog mentions that Screen has been removed from the desktop version.


But back to Unity: there's not much that works right now, but here is a video I've recorded with the latest Unity in Ubuntu 11.04 Natthy Narwhal (as of today):


(For more videos, subscribe to our YouTube channel and Facebook page.)


As you can see, there's no Dash yet (the Ubuntu logo in the top left corner just triggers the Unity launcher unhide) so you must use a terminal to launch applications, the quicklist menu items have some random text (for testing purposes for now) so Unity is not really usable yet.

But there are some things that already work: you can set the Unity launcher ("dock") to autohide or float and the desktop switcher finally works.


There is A LOT of work to be done, but let's not forget that Ubuntu 11.04 Natthy Narwhal alpha 1 is expected on December 2nd, so we're just at the beginning of the road.

Touchpad Indicator Lets You Quickly Enable / Disable The Touchpad

Touchpad indicator

Touchpad Indicator is a very simple indicator created by Lorenzo Carbonell (the Picapy developer), which as the name suggests, is designed to allow you to easily enable / disable your laptop or netbook touchpad.

To install Touchpad Indicator in Ubuntu (10.10 Maverick Meerkat only), you'll have to use the same PPA for Picapy:
sudo add-apt-repository ppa:lorenzo-carbonell/atareao
sudo apt-get update
sudo apt-get install touchpad-indicator

Once installed, you'll find it under Applications > Accessories > Touchpad Indicator.


See also: automatically disable the touchpad when you start typing (includes a script to enable/disable the touchpad using a hotkey for those with no built-in hotkey for this).


Thanks once again to Lorenzo Carbonell!

Jumat, 26 November 2010

Install Rhythmbox 0.13.2 In Ubuntu 10.10 Maverick Meerkat

Rhythmbox 0.13.2

Rhythmbox 0.13.2 was released almost a month ago and as usual, it's not available for the Ubuntu 10.10 users. The new versions comes with some interesting improvements such as:
  • Much improved Last.fm (and Libre.fm) plugin
  • Support for DACP (iTunes remote)
  • Zeitgeist plugin
  • New podcast sub-sources showing newly posted and recently downloaded episodes
  • Slightly improved integration with the GNOME Shell message tray
  • Various fixes for iPod support
  • See the whole list of bug fixes and new features at Rhythmbox devel mailing list

Yesterday, I've backported Rhythmbox 0.13.2 from Ubuntu 11.04 Natty Narwhal to Ubuntu 10.10 Maverick Meerkat - that means that the Ubuntu 10.10 package is identical to the one in Ubuntu 11.04 (but built for Ubuntu 10.10). Everything seems to be working for me so I've uploaded it to the WebUpd8 Rhythmbox PPA.

Install Rhythmbox 0.13.2 in Ubuntu 10.10

Before installing Rhythmbox 0.13.2, please note that I had to backport about 4 other packages to get DAAP and all the other plugins to compile proprely. While I've tested Rhythmbox, I cannot test everything so there might be stuff that doesn't work - therefore use this PPA at your own risk. But don't worry about undoing the changes made by this PPA - PPA Purge will solve everything in case something goes wrong (see below).

To add the WebUpd8 Rhythmbox PPA and upgrade to the latest Rhythmbox 0.13.2 (in Ubuntu 10.10 Maverick Meerkat only!):
sudo add-apt-repository ppa:webupd8team/rhythmbox
sudo apt-get update
sudo apt-get dist-upgrade


Rhythmbox radio browser 2.3.1

Update: along with Rhythmbox, I've also uploaded the latest rhythmbox-radio-browser 2.3.1. Install it from the same PPA using the following command:
sudo apt-get install rhythmbox-radio-browser


Undo any changes made by the WebUpd8 Rhythmbox PPA

Like I said, in case something goes wrong, you can undo all the changes made by the WebUpd8 PPA using PPA Purge. Firstly, install PPA Purge:
sudo apt-get install ppa-purge

Then purge the PPA using the following command (PPA Purge disables the PPA and downgrades all the packages in that PPA so everything should go back to the state before adding the PPA):
sudo ppa-purge ppa:webupd8team/rhythmbox

Kamis, 25 November 2010

Dropbox Share 0.2.3 Gets Emblems For Shared Files And Folders [Nautilus Script]

Dropbox Share file emblems

Thanks to theradioboy's tip, I've implemented emblems for the shared files and folders in the latest Dropbox Share Nautilus script (v0.2.3).

Dropbox Share now automatically adds emblems to the files you've shared (even though these files are not in your Dropbox folder) and removes them when you unshare the files. Please note that you need to unshare the files via the Dropbox Unshare script (it's also included in Dropbox Share package - all you have to do is select the files you want to unshare, right click them and under "Scripts" you'll find both "Dropbox Share" and "Dropbox Unshare") or else the emblems won't be removed!

Because there is no way to refresh Nautilus by directly calling it via command line, I've used a "hackish" way to do it: the script will send "F5" to the window (just as if you've pressed it) which should instantly make the file emblems show up. If for some reason the emblems are not updated automatically, simply press F5.


Here is a video demoing the new emblems feature in Nautilus Share 0.2.3:


Install Dropbox Share in Ubuntu:
sudo add-apt-repository ppa:nilarimogard/webupd8
sudo apt-get update
sudo apt-get install dropbox-share


Dropbox Share is now available on Launchpad so you can easily submit bugs: https://launchpad.net/dropbox-share

Easily Upload Images To PicasWeb Using Picapy

Picapy

If you're looking for an easy way to manage your PicasaWeb images, try Picapy, an application to mass upload, delete or get the URL of your PicasaWeb pictures - nothing fancy, but it's lightweight and very easy to use.

Usage: there are 3 buttons on the right - clicking the "+" button while being outsite of the album will create a new album. Selecting an album and clicking the "+" button will allow you to upload images to that album.

Right click an image in Picapy and then select "Help" to get some info on that image such as it's direct URL or thumbnail URL.


Install Picapy in Ubuntu

Ubuntu 10.10 Maverick Meerkat users can add the Picapy PPA and install it from there:
sudo add-apt-repository ppa:lorenzo-carbonell/atareao
sudo apt-get update
sudo apt-get install picapy


For other Ubuntu versions (tested with Ubuntu 10.04, I'm not sure if it works in older versions too), you can download Picapy .deb (for both 32bit and 64bit).


Thanks to Lorenzo Carbonell @ atareao.es for Picapy and for updating it with an English translation!

Rabu, 24 November 2010

Foobnix 0.2.2 Comes With Lots Of Changes, Ubuntu PPA

Foobnix

Foobnix, a very interesting music player we wrote about a while back (check out that post for a complete review) has been updated to version 0.2.2 and also it now comes with an Ubuntu PPA.

Since our last Foobnix post, there have been many changes to this Linux music player: most parts have been re-written, the interface has been revamped - the info panel being a lot more clear and easy to use now, global hotkeys, proxy support, configurable notification area icon, 100 new radio stations have been added and many other changes.

Still, even though there have been so many changes to Foobnix, there is still a lot of work to be done. Also, the controls look weird with most themes because they don't expect the menu to be on the same row as the controls (it especially looks ugly with Orta theme).


Foobnix tray popup

Before you start criticizing its "special feature" (online music - I won't get into detail here, see our initial Foobnix post for more info), you should know there's more to Foobnix then this: Foobnix features a really unique user interface, with the menu next to the controls, complete Last.fm info such as: similar artists, similar songs, top 50 songs and so on, and a very interesting notification area popup (among many others). So give it a try and if you don't like the online music feature, simply don't use it.


Install Foobnix in Ubuntu

To add the Foobnix PPA (available for Ubuntu 10.10 Maverick Meerkat only for now), use the following commands:
sudo add-apt-repository ppa:foobnix-player/foobnix
sudo apt-get update
sudo apt-get install foobnix


If you're using Ubuntu Lucid, you can try installing the Maverick .deb files (it worked fine for me, however I have many PPAs added so I'm not 100% sure it will work in Lucid):

Script To Automatically Apply the "200 Lines Kernel Patch" Alternative In Ubuntu

Because many people had trouble following the instructions in our Alternative To The "200 Lines Kernel Patch That Does Wonders" Which You Can Use Right Away post, superpiwi @ Ubuntu Life created a script that does everything automatically for you.

The script was initially in Spanish, but I've translated it into English and I've also corrected 3 small errors which caused the script not to work.

To see that if you follow the exact instructions, everything works and you won't get any error when opening new terminals, I've recorded a video showing how I've ran the script on my netbook (using Ubuntu 10.04):


Important:
  • To use this script, you must remove the changes you have made by following the instructions in the Alternative To The "200 Lines Kernel Patch That Does Wonders" Which You Can Use Right Away post (that involves removing the code you've added to ~/.bashrc, /etc/rc.local and completely remove the /usr/local/sbin/cgroup_clean file)! If you do not do this, the script will not work! You have been warned.
  • The script has only been tested on Ubuntu (10.10 an 10.04)
  • Even though I've tested the script, it may not work for everybody so use it as is. There are no guarantees it will work and I take no responsibility if it doesn't.
  • Always check the code of a script you run on your computer. You can download the script from HERE.


Now that you've read the "disclaimer", you can go ahead and use the script. Open a terminal and copy/paste the following commands:

cd
wget http://launchpadlibrarian.net/59511828/cgroup_patch
chmod +x cgroup_patch
sudo ./cgroup_patch

Now you can either restart your computer or simply run:
sudo /etc/rc.local


Credits and many thanks for the script: superpiwi @ Ubuntu Life.

Selasa, 23 November 2010

Ubuntu Becoming A Rolling Release Distro?!?

According to Ostatic, Mark Shuttleworth, said that Ubuntu will likely be moving from its current six-month release schedule to daily updates which would make Ubuntu a rolling-release Linux distribution.

Today we have a six-month release cycle. [...] In an internet-oriented world, we need to be able to release something every day. That's an area we will put a lot of work into in the next five years. The small steps we are putting in to the Software Center today, they will go further and caster than people might have envisioned in the past.

- Mark Shuttleworth


However, the above quote is all Ostatic and The Register give us regarding this (and I for one won't believe it until I actually see the words "rolling release" used by Mark Shuttleworth).

Rolling... what?

Rolling release means you won't have to upgrade / do a clean install each time a new Ubuntu version is released to be able to use the latest software versions. As an example: Ubuntu 10.04 shipped with VLC 1.0.x and you cannot and will not be able to install VLC 1.1.x in Ubuntu 10.04 from the official repositories. The only way to install VLC 1.1.x in Ubuntu 10.04 is to use a PPA or upgrade to Ubuntu 10.10. That will not be the case with Ubuntu anymore (though this is not yet certain) - you will get updates for all your applications without having to install the latest Ubuntu version - you would already have it if you've kept updating.


Update: Rick Spencer says Ubuntu is not moving to a rolling-release. From his blog:

"Ubuntu is not changing to a rolling release. We are confident that our customers, partners, and the FLOSS ecosystem are well served by our current release cadence. What the article was probably referring to was the possibility of making it easier for developers to use cutting edge versions of certain software packages on Ubuntu.This is a wide-ranging project that we will continue to pursue through our normal planning processes."

Gnome Shell Automatic Workspaces Mockup (Tiled View Follow-Up)

This is getting more interesting every day!

A while back we've told you about an interesting Unity mockup for managing multiple workspaces that automatically creates the workspaces and always keeps an empty workspace so you don't have to create the workspaces yourself (and you always have the number of workspaces that you actually need).

Unfortunately, Mark Shuttleworth didn't like the idea (at least the way it was described back then) so it seems like we won't have this in Unity. But on the other hand, it looks like we'll have it in Gnome Shell (not exactly the same, but the same concept is being used). Read on!


Gnome Shell tiled view mockup


If you remember the Tiled View Gnome Shell mockup we've talked about yesterday, Jakub Steiner said "[... ] we still rely on the user to do workspace "management. So the next step is to make the Shell do the heavy lifting. Stay tuned." Well, today he posted another mockup that behaves a lot like the Unity workspaces mockup I've told you about in the beginning of the post:
  • There are no empty workspaces (apart from the initial state of not having any windows open whatsoever). If there are no longer any windows on a particular workspace, it gets merged with the adjacent one. This is a bit different then Unity because in Gnome Shell, you'll never have an empty workspace (as opposed to the Unity mockup where you always have one empty workspace), but the base idea is the same: always have the number of workspaces you'll need, without having to create them yourself.
  • To launch an application in a new workspace, you drop the launcher on the [X] target thumbnail. Similarly you can launch it onto existing workspace or move windows to a new/existing workspaces.


Also related to Gnome Shell: I've yet again updated the post on how to compile Gnome Shell in Ubuntu 10.10 so check it out if you want to try it yourself (but you won't get the automatic workspaces feature since this is a mockup for now).


Your thoughts?

Nautilus Dropbox Share Script, Now Available In An Ubuntu PPA

A while back I wrote a Nautilus script for easily sharing any file or folder using Dropbox, via right click. But scripts get lost, especially since most people do a clean Ubuntu install every 6 months. Also, I guess it's easier to simply install it from a PPA / .deb then having to manually install the dependencies and moving the script to the right folder and so on. For this reason, I've packaged my Dropbox Share script in a .deb and uploaded it to the main WebUpd8 PPA.

A little recap on what Dropbox Share does: using it, you can right click any file or folder (!) on your computer and share it via Dropbox. The script creates a link to the file / folder you want to share, in your Dropbox Public folder and automatically copies the link(s) to the clipboard so you can paste it in an email, IM window and so on.


Why using this script is better then copying some files in your Public Dropbox folder:
  • because the script uses symbolic links, the files aren't actually copied to your Dropbox public folder, so they won't take the double amount of space
  • all the links are automatically copied to the clipboard
  • you can even share folders, even though Dropbox doesn't allow this by default (the shared folder will have an "index.html" file and thus opening its link in a web browser, it can be easily accessed via a web browser)

But since explaining all this is wrather difficult, here's a video I've recorded back when I've released version 0.2:


Install Dropbox Share in Ubuntu

Before installing Dropbox Share, make sure you remove any previous versions of the script (both Dropbox Share and Dropbox Unshare) you may have in ~/.gnome2/nautilus-scripts:
rm ~/.gnome2/nautilus-scripts/"Dropbox Share"
rm ~/.gnome2/nautilus-scripts/"Dropbox UnShare"

Dropbox Share is available for Ubuntu Karmic, Lucid, Maverick and Natty, but has only been tested on Lucid and Maverick. To add the PPA and install Dropbox Share, use the following commands:
sudo add-apt-repository ppa:nilarimogard/webupd8
sudo apt-get update
sudo apt-get install dropbox-share


If you're not using Ubuntu, you can get the script from our previous post: Share Any File Or Folder With Dropbox Via Right Click (Nautilus Script) - New Version


The .deb package also comes with the Dropbox Unshare script - thanks to Nicolargo. Credits for Dropbox Index which is used by Dropbox Share: kosciak1.


And since this is a post about Dropbox, here's a tip for you: you can grab up to 768 MB free dropbox space through social media connections - click HERE (don't worry, I don't win anything if you click that link).

Opera 11 Beta Released With Tab Stacking

Opera 11 beta - tab stacking

After adding a new address field, visual mouse gestures and an updated mail panel last week, Opera 11 beta has been released today with yet another innovation: tab stacking.

To get an idea on what tab stacking is, I've recorded a video you can watch below:


To create a stack you must drag and drop a tab onto another tab. Hovering a stack gives you a visual overview on what's inside that stack. And you can of course expand and colapse the stacks with a click.


Tab stacking is designed for those who like having a lot of tabs open in their browser and it can be used to stack different tasks, create stacks just for freeing up some space on the tab bar, or just stack some tabs because you need them later and don't want to bookmark them (that's what I always do).


Tab stacking seems to be Opera's reponse to the Panorama (initially called Tab Candy) introduced in Firefox 4.0. It will be interesting to see if Chrome will add an easy way of organizing the tabs too and if they will copy Firefox / Opera or come up with an original idea.


Download Opera 11 beta (includes Ubuntu .deb files as usual)

Senin, 22 November 2010

Tiled View: New Gnome Shell Mockup

A new Gnome Shell mockup shows how the old Gnome Shell behavior (which is actually still the current Gnome Shell behavior) and the new Overview-Layout Gnome Shell branch can work together, bringing both innovation and usability (called "Tiled view"):


(If your video does not support HTML5, you can watch the video @ YouTube - but it's lower quality)


The workspace sidebar is hidden by default, and slides out when the cursor is near the edge of the screen or when a drag is initiated on a window or launcher.


But that's not all! Jakub Steiner explains on his blog:

Now while I think the workspace thumbnailing addresses the most useful part of the tiled view, we still rely on the user to do workspace "management". So the next step is to make the Shell do the heavy lifting. Stay tuned.


What do you think?


Keep Your Desktop Clean With Directory Cleaner And Files Organizer

Directory cleaner and files organizer

In my search for a clean Desktop (because I got tired of cleaning it manually), I came across "Directory cleaner and files organizer", a script (with Zenity for a GUI) that automatically cleans any directory (and thus the Desktop folder) by moving the files to various folders such as all the pictures into ~/Pictures, the archives into ~/Archives, documents into ~/Documents and so on.

The script recognizes more than 470 extensions and the directories where it moves the files can be customized in the settings. Also, I'm using it for organizing my Desktop but you can use it for any other folder such as the ~/Downloads folder and so on.

Directory cleaner and files organizer has 2 options for cleaning: "Start-Cleaning" which moves all the files in the selected directory to the directories you've set in its settings, overwriting any existing files, and "Advanced-Cleaning" which is a smart way of moving the files:
  • if the file that's going to be moved already exists in the destination folder, a new folder with its extension is created and the file is moved into that folder.
  • if that folder also has a file with the same name, the file is renamed using the date and time so the file never gets overwritten


Installation

Before proceeding with the installation, remember to always check the source of any script you run on your computer!

Directory cleaner and files organizer only depends on Zenity which should already be installed. To install Directory cleaner and files organizer, download if from HERE, extract it and double click the "install.sh" file.

Once installed you can find it under Accessories > Files-Oraganizer.


Configuring Directory cleaner and files organizer

Directory cleaner and files organizer clean paths can be configured. By default, selecting "Edit-Settings" will pop up the following configuration:

Edit path's for your files with exact order
-----------------------------------------------------
/home/YOUR_USERNAME/Pictures
/home/YOUR_USERNAME/Music
/home/YOUR_USERNAME/Documents
/home/YOUR_USERNAME/Videos
/home/YOUR_USERNAME/Archives
/home/YOUR_USERNAME/Scripts

You can get an idea on what each folder is for (therefore I won't get into detail here since it's obvious), so you can easily modify it to point to some other location.


Directory cleaner and files organizer is not 100% automated as you have to run it and select the folder you want it to clean. But if you know a bit of Bash, you can always tweak it so you can launch it via command line (without Zenity) and then add it to an hourly cron job.

Install Pidgin 2.7.7 in Ubuntu (With MSN Certificate Fix And Multiple MSN Logins)

Pidgin 2.7.7

Pidgin 2.7.7 was released, fixing the "Unable to validate certificate" error for omega.contacts.msn.com (so if the Pidgin (MSN) Omega.contacts.msn.com Certificate Errors fix didn't work for you, try the new Pidgin 2.7.7).

Pidgin 2.7.7 also comes with support for MSNP16, including Multiple Points of Presence (MPOP) which allows multiple simultaneous sign-ins for MSN. A complete changelog can be found HERE.


Pidgin 2.7.7 is not yet available in the Ubuntu Pidgin PPA, however you can install it via GetDeb (for Ubuntu 10.04 and 10.10):

1. Download THIS .deb and install it - it will add the GetDeb repository.

2. Run the following command to update your software sources:
sudo apt-get update

3. Upgrade Pidgin:
sudo apt-get upgrade

The above command will also upgrade some other packages which are installed on your computer and for which there are newer versions available on GetDeb. If you don't want those, instead of running "sudo apt-get upgrade", open Synaptic, upgrade Pidgin only and then remove the GetDeb repository (from Software Sources).


Important: If GetDeb is very slow for you (that's the case for me at the time I'm writing this post), you can use the following GetDeb mirror instead of the official GetDeb (edit the /etc/apt/sources.list.d/getdeb.list file and replace the existing line with the one below):

deb http://mirrors.dotsrc.org/getdeb/ubuntu maverick-getdeb apps

(The above repository is for Maverick. If you're using Lucid, replace "maverick" with "lucid").


After upgrading, close Pidgin and open it again, then if the certificate error still occurs, try connecting a few times and it should work.

Last 2 Weeks Top Posts (Weeks 45, 46 - 2010)

  1. Alternative To The "200 Lines Kernel Patch That Does Wonders" Which You Can Use Right Away
  2. Fix Pidgin (MSN) Omega.contacts.msn.com Certificate Errors
  3. First Compiz Based Unity Screenshots [Ubuntu Natty PPA]
  4. Install Compiz 0.9.2.1 In Ubuntu 10.10 Maverick Meerkat
  5. Gorgeous Orta Theme Gets New Metacity, 2 Panel Styles, A Configuration Tool And More
  6. BURG Manager 1.0 Released With Option To Boot ISO From BURG, New Themes, More
  7. Install Compiz 0.8.x Experimental Plugins In Ubuntu
  8. Fuduntu Is A Fedora 14 Remix For Netbooks And Laptops
  9. Display Multiple Folders Content In One Directory With Nautilus Easy Union
  10. Install Gnome2 Globalmenu In Ubuntu 10.10 Maverick Meerkat
  11. Battery Status PPA, Finally Updated With Ubuntu 10.10 Maverick Meerkat Packages

Minggu, 21 November 2010

Firefox 4.0 For Linux Finally Gets A Unified Menu

Even though the Mozilla developers initially said they wouldn't do it, here it is: Firefox 4.0 (nightly build) finally gets an unified menu button. But not the way it's integrated in Windows (in the titlebar), but next to the tabs.


Here is how Firefox 4.0 for Windows looks like:

Firefox 4.0 Windows menu


And here is the new Firefox unified menu for Linux (from the latest Firefox 4.0 nightly):

Firefox 4.0 menu linux


To get the new unified menu, you need the latest Firefox 4.0 nightly build which you can either install from the Mozilla Daily PPA (I do not recommend it) or by simply downloading the latest Firefox 4.0 nightly from HERE (to use: extract it, then double click the "firefox" file - important: not firefox-bin!).

Once you have the latest Firefox 4.0 up and running, go to View > Toolbars and uncheck "Menu bar" - then you should get the new unified menu.


Thanks to Ubuntu Life & Soft Libre for the news. Credits for the Windows Firefox screenshot: gawkerassets.com

Grub Customizer 2.0 Can Change The Default Grub2 Boot Entry, Menu Colors, Background Image And Lots More

Grub Customizer 2.0

With the release of version 2.0, Grub Customizer becomes the most complete GRUB 2 graphical configuration tool.


Grub Customizer - a new graphical GRUB 2 and BURG settings manager -, 2.0 has been released today with a lot of enhancements: you can now select the default boot entry, change the menu visibility and timeout, set kernel parameters, disable recovery entries and change screen resolution (GFX_MODE) - all by using Grub Customizer.


Grub Customizer appearance
(Grub Customizer 2.0 - Appearance preferences)

Besides the above new features, Grub Customizer 2.0 also brings some GRUB 2 only specific settings (they don't work for BURG) like changing the menu colors or background image. Please note that these appearance options worked for me in Ubuntu 10.04 but did not work in Ubuntu 10.10 - however this might happen because I've messed a lot with the GRUB 2 configuration (including running the script for fixing the Plymouth).


Grub 2 - colors
(GRUB 2 with new colors)


Install Grub Customizer in Ubuntu:
sudo add-apt-repository ppa:danielrichter2007/grub-customizer
sudo apt-get update
sudo apt-get install grub-customizer

Once installed, you can find it under Applications > System Tools > Grub Customizer.


For other Linux distributions: download Grub Customizer @ Launchpad (you'll have to get it through BZR).


For a similar BURG only tool, see Burg Manager.

Poll Results: Best Linux Twitter Client

Our "Best Linux Twitter Client" poll ended today. And the winner is.... (no surprise here): Hotot (40%), followed by Gwibber (29%) and Choqok (13.7%).

Here are the exact poll results:

Best Linux Twitter Client


Pino would have probably gotten a lot more votes if it worked with OAuth (even though it does work without OAuth with a trick, but most people probably don't know that). Either way, it's amazing how an application (Hotot) which until 2 months ago nobody knew it exists now takes the first spot of the Best Linux Twitter Client poll.


If you have an idea for a poll we didn't have on WebUpd8, let us know in the comments!


Window Applets 0.2.9 Finally Gets Emerald Support, Comes With 4 New Themes

Window applets


Window Applets are 2 Gnome panel applets that display the window tile and buttons.

Because we got a lot of comments from people not understanding what Window Applets does, here's a short description (and a new screenshot - hopefully it's clear now): 

You can set Window applets to control only maximized windows (but Window Applets can control non-maximized windows too) and remove the maximized windows titlebar, thus gaining some extra vertical space, but still see the window title and control the windows using the Window Applets. Ubuntu 10.10 Netbook edition has something similar by default, but what's so great about Window Applets is that the Window Title and Window Buttons are 2 separate applets so you can place each wherever you want (like for instance: the Window Title in the middle of the panel and Window Buttons on the right, after the Session Indicator applet). 

Also, unlike the Ubuntu 10.10 Netbook Edition applet, "Window Applets" supports themes for the buttons on the panel - and comes with a lot of themes by default, as well as many other customizations.


Window Applets 0.2.9

Window Applets 0.2.9 was released yesterday, adding 4 new themes: Blubuntu, Equinox Glass, Plano and New Hope. Also, starting with the latest version, Emerald is finally working with Window Applets.


Here are the complete Window Applets 0.2.9 release notes:
  • Major code cleanups, rearangements and optimizations
  • Added plaintext settings backend (enable by setting PLAINTEXT_CONFIG to 1)
  • Fixed desktop detection (+ got rid of potential segfaults)
  • Bugfix: hide_on_unmaximized causes buttons to not reappear if disabled when currentwindow not present
  • Changed theme model from 16 to 24 images (added 2 new unfocused states) and made it backwards compatible
  • Fixed Compiz detection for maximized windows. Coincidentally this also makes Emerald work
  • Added new themes: Blubuntu, Equinox-Glass, Plano, New-Hope
  • Bugfix: Ensure the title gets truncated if it runs out of space
  • Forced the Expand option due to GTK+ bugs. It can be disabled in gconf-editor, but then you should also set a fixed title_size
  • Bugfix: Icon padding wrong on different panel orientations


Install Window Applets 0.2.9 in Ubuntu

I've been waiting for T. Scott Barnes's Misc PPA to get an update with the latest Window Applets but unfortunately the update didn't came (yet) so I've uploaded the latest Window Applets 0.2.9 in the WebUpd8 PPA.

To add the WebUpd8 PPA and install Window Applets 0.2.9 (available for Ubuntu 10.04 and 10.10), use the following commands:
sudo add-apt-repository ppa:nilarimogard/webupd8
sudo apt-get update
sudo apt-get install gnome-window-applets

Then, right click the Gnome Panel, select "Add to panel" and add "Window Title" and "Window Buttons". The applets are set to only be displayed for maximized windows so for chaging their settings, maximize a window so you can actually see the applets, then right click each of the two applets and select "Prefereces", then set everything to suit your needs.

If the Window Buttons applet doesn't show up on the panel after the installation even when maximizing a window, run the following command:
killall gnome-panel

And it should then work.


For other Linux distributions, see Window Applets page @ Gnome Look.


Thanks to Hadret for the debianization! You can install Window Applets in Debian by using Hadret's repository.

Jumat, 19 November 2010

Use MintMenu In Avant Window Navigator [AWN Applet]

MintMenu Avant Window Navigator

Avant Window Navigator already has some menu applets, but none as good as MintMenu.

But now you can use MintMenu in AWN, thanks to Neelance who maintains a PPA for MintMenu AWN applet which you can install (Ubuntu Lucid and Maverick; should work in Linux Mint) using the following commands:
sudo add-apt-repository ppa:neelance/awn
sudo apt-get update
sudo apt-get install awn-mintmenu

You'll also need the regular MintMenu installed (<-- click for installation instructions) to be able to use this!

Then add the MintMenu applet to AWN. If it takes too long for the menu to load, quit AWN and start it again (this is a known issue that occurs sometimes as noted in the PPA description).


A big thanks to Kevin McDole for sending us the tip!

Faenza Icon Theme 0.8 Brings Lots Of New Icons, Reworked Icons For Chrome, Firefox And More

Faenza icons 0.8

The well known Faenza Icon theme was updated today (version 0.8), bringing icons for some applications which were missing such as: adobe air, deadbeef, devede, devhelp, dia, facebook, flickr, frostwire, glade, gnucash, gnumeric, homebank, jdownloader, kupfer, netbeans, openbravo, openerp, openshot, phatch, picasa, qtcreator, radiotray, soundconverter, terminator, vim, wordpress, wxbanker, xbmc and xournal.

But that's not all. The latest Faenza 0.8 also brings reworked icons for Gwibber, Firefox, Chromium and Google Chrome, a whole new set of emblems and weather icons and new monochromatic icons for applications.


Ubuntu users can install Faenza Icon theme using a PPA (available for Ubuntu Karmic, Lucid and Maverick):

sudo add-apt-repository ppa:tiheum/equinox
sudo apt-get update
sudo apt-get install faenza-icon-theme


You can also install the folowing packages:

  • "faenza-icons-mono" to replace 22x22 squared icons for Deluge, Exaile, Fusion Icon, iBus and Kupfer by their monochromatic versions
  • "faenza-extras" or "faenza-dark-extras" to override some icons displayed in system tray by Faenza monochromatic ones. This affects Liferea, LastFM and RadioTray.


The same PPA also hosts the amazing Equinox themes.


If you're not using Ubuntu, you can download Faenza Icon Theme via Gnome-Look.

DockBarX 0.40 Has Been Released

DockBarX

DockBarX 0.40 has been released last night, bringing the following changes:
  • The default theme has changed. The new default theme DBX is made by BigRZA. It's made to look good with Radiance and Ambiance. (The old default theme is still included under the name Old.)
  • Another theme by BigRZA, Sunny Colors is also included by default
  • The theme Human bar is removed since it was pretty much an older version of the new default theme.
  • Number of entries in recent and most used menus are increased to eight (for real this time).
  • A few new languages and updates to translations.


Dockbarx 0.40 new default theme
(The new default theme in DockBarX 0.40)


For those who are not familiar with DockBarX: it's a taskbar with grouping and group manipulation which works as an applet for both the GNOME Panel (see the images above) and Avant Window Navigator (image below):

DockBarX Avant Window Navigator


As usual, I've uploaded the latest DockBarX 0.40 in the WebUpd8 PPA, along with an updated extra themes package (it's required to upgrade to the latest dockbarx-themes-extra version if you've ever installed it or else you'll get an error when installing DockBarX) and the AWN applet. With this update, I've also uploaded packages for Ubuntu 11.04 Natty Narwhal (for all the DockBarX related packages).

To add the WebUpd8 PPA and install DockBarX and the extra themes, use the following commands:
sudo add-apt-repository ppa:nilarimogard/webupd8
sudo apt-get update
sudo apt-get install dockbarx dockbarx-themes-extra

To also install the Avant Window Navigator applet:
sudo apt-get install awn-applet-dockbarx

Kamis, 18 November 2010

Fix Pidgin (MSN) Omega.contacts.msn.com Certificate Errors

I said I won't be posting "fixes", but this one is way too annoying not to help you fix it.


If you're using Pidgin with MSN, you probably got lots of "omega.contacts.msn.com" certificate errors today. Here is how to fix it.


1. Download this omega.contacts.msn.com certificate.

2. In Pidgin, go to Tools > Certificates and remove the existing "omega.contacts.msn.com" certificate. Then select "Add" and add the certificate downloaded under step 1 and when prompted to enter the hostname, enter: "omega.contacts.msn.com":

Pidgin omega.contacts.msn.com fix


Now click OK and that's it!


Update: Pidgin 2.7.6 has been released, bringing a fix for this issue. See: Install Pidgin 2.7.6 in Ubuntu (With MSN Certificate Fix And Multiple MSN Logins)

Thanks to Lazonakf for the fix!

Alternative To The "200 Lines Kernel Patch That Does Wonders" Which You Can Use Right Away

Phoronix recently published an article regarding a ~200 lines Linux Kernel patch that improves responsiveness under system strain. Well, Lennart Poettering, a RedHat developer replied to Linus Torvalds on a maling list with an alternative to this patch that does the same thing yet all you have to do is run 2 commands and paste 4 lines in your ~/.bashrc file. I know it sounds unbelievable, but apparently someone even ran some tests which prove that Lennart's solution works. Read on!

Basically, Lennart explains you have to add this to your ~/.bashrc file (important: this won't work on Ubuntu. See instructions for Ubuntu further down the post!):

   if [ "$PS1" ] ; then  
mkdir -m 0700 /sys/fs/cgroup/cpu/user/$$
echo $$ > /sys/fs/cgroup/cpu/user/$$/tasks
fi

And run the following commands as super user:
mount -t cgroup cgroup /sys/fs/cgroup/cpu -o cpu
mkdir -m 0777 /sys/fs/cgroup/cpu/user

Further more, a reply to Lennart's email states that his approach is actually better then the actual Kernel patch:

I've done some tests and the result is that Lennart's approach seems to work best. It also _feels_ better interactively compared to the vanilla kernel and in-kernel cgrougs on my machine. Also it's really nice to have an interface to actually see what is going on. With the kernel patch you're totally in the dark about what is going on right now.

-Markus Trippelsdorf

The reply also includes some benchmarks you can see @ http://lkml.org/lkml/2010/11/16/392

Use it in Ubuntu


Update (November 24): because many people had trouble following the instructions below, there is now a script that automatically does everything for you. See: Script To Automatically Apply the "200 Lines Kernel Patch" Alternative In Ubuntu


To use Lennart's solution in Ubuntu (not tested - thanks to Lsh for this), you have to replace "/sys/fs" with "/dev". So you would have to add the following commands in your /etc/rc.local (open it with: sudo gedit /etc/rc.local) file, above the "exit 0" line:

mkdir -p /dev/cgroup/cpu
mount -t cgroup cgroup /dev/cgroup/cpu -o cpu
mkdir -m 0777 /dev/cgroup/cpu/user
echo "/usr/local/sbin/cgroup_clean" > /dev/cgroup/cpu/release_agent

and make it executable:
sudo chmod +x /etc/rc.local

And then add the following to your ~/.bashrc file (to open it: gedit ~/.bashrc):

if [ "$PS1" ] ; then  
mkdir -p -m 0700 /dev/cgroup/cpu/user/$$ > /dev/null 2>&1
echo $$ > /dev/cgroup/cpu/user/$$/tasks
echo "1" > /dev/cgroup/cpu/user/$$/notify_on_release
fi

Run the following command:
sudo gedit /usr/local/sbin/cgroup_clean

And paste this:

#!/bin/sh
if [ "$*" != "/user" ]; then
rmdir /dev/cgroup/cpu/$*
fi

then save the file and make it executable:
sudo chmod +x /usr/local/sbin/cgroup_clean

And finally, restart the computer or manually run the /etc/rc.local file ("sudo /etc/rc.local").


Update November 19: The above instructions have been updated again to "really" automatically remove empty cgroups (thank to Ricardo Ferreira using the instructions he sent.).


Update 2: if you don't want to follow the manual steps above, you can use some patched kernels (Warning: use these at your own risk!!!) for Ubuntu 10.10:

If you want to go even further and install a patched Kernel, you can download a "200 lines" patched Kernel (for 64bit only!) from HERE (thanks to accumulator @ Phoronix forums).

Also, WebUpd8 reader Scott Franke shared a Kernel he patched with bfs with which he says he gets better performance then with the "200 lines patch". Download (also 64bit only!): 1 and 2 (both .deb files required).

Both of the above 2 Kernels are for Ubuntu 10.10 only! Use them at your own risk!


Read the discussion @ http://lkml.org/lkml/2010/11/16/392 | via Habrahabr.ru (thanks to Lsh)


More on this topic:

MintMenu With Ubuntu Software Center Patch Available In the WebUpd8 MintMenu PPA

MintMenu Ubuntu Software Center

Because this was very requested, today I've uploaded a patch Mint Menu in our MintMenu PPA, which includes a link to the Ubuntu Software Center.

In case you don't know, we maintain a PPA for easily installing MintMenu in Ubuntu. However, the original MintMenu does not include a link to the Ubuntu Software Center (I've named it "Software Center" so the name doesn't get truncated) so the only way to launch USC when using MintMenu was from the command line. But this changes with the patch today (nothing major, just changed 2 lines of code) - as you can see in the screenshot, you can launch Ubuntu Software Center directly from the MintMenu.

I also took this opportunity to upload MintMenu packages for Ubuntu 11.04 Natty Narwhal so if you're using Natty already, you can already use MintMenu (but I haven't tested it on Natty yet).

To add the WebUpd8 MintMenu PPA and install MintMenu, use the following commands (remember, this PPA is for Ubuntu only, and not for Linux Mint users!):
sudo add-apt-repository ppa:webupd8team/mintmenu
sudo apt-get update
sudo apt-get install mintmenu

Then right click your Gnome Panel, select "Add to panel" and add MintMenu. If MintMenu doesn't show up on the applets list, try restarting the Gnome Panel(s):
killall gnome-panel


MintMenu is also available in the main WebUpd8 PPA!


Thanks to WebUpd8 reader Joe for the MintMenu patch!

Rabu, 17 November 2010

QMLSaver Is A Nice Clock Screensaver For Ubuntu

QMLSaver

If you had trouble installing the Noflipqlo screensaver or simply didn't want to go through so many steps to install a screensaver, you can try QMLSaver. It's not exactly the same thing, but the animation is still pretty nice as you can see in the video below:


To install QMLSaver in Ubuntu 10.10 Maverick Meerkat (works on both Gnome and KDE), use the following commands:
sudo add-apt-repository ppa:prodoomman/qmlsaver
sudo apt-get update
sudo apt-get install libqt4-dev qmlsaver

Then go to System > Prefereces > Screensaver and you should find QMLSaver among the available options.

Install Gnome2 Globalmenu In Ubuntu 10.10 Maverick Meerkat

Gnome2 Globalmenu

Having so many posts on "global menus", you probably know by now what a "global menu" is. If not, take a look at the above screenshot.

Ubuntu 10.10 Netbook Edition comes with a global menu (not Gnome2 Globalmenu but its own "global menu") which works with some Qt applications as opposed to Gnome2 Globalmenu, however Gnome2 Globalmenu is still better for GTK applications (for now anyway) as it allows far more customizations then the Ubuntu global menu. But this is not a post on pros and cons for these 2 applications but about installing Gnome2 Global menu in Ubuntu 10.10 Maverick Meerkat.

You could already install Gnome2 Globalmenu in Ubuntu 10.10 but you had to manually download and install 4-5 .deb files which is not exactly user friendly. Besides, a new version was released a couple of days ago and it's not available in the Gnome2 Globalmenu PPA - reason for which I've decided to upload this new version (0.7.10 - unfortunately I didn't find any changelog for this version and also I don't see any visible new features) to the WebUpd8 PPA.

Install Gnome2 Globalmenu in Ubuntu 10.10 Maverick Meerkat

Before installing, please note that the latest version - 0.7.10 -, does not come with XFCE packages anymore (that's because of the Gnome2 Globalmenu, not due to my packaging).

Important: I've experienced some issues with the Linux Mint 10 default theme (Mint-X theme) so if you want to use this theme, it's better not to install/upgrade to the latest Gnome2 Globalmenu! However, all the other themes I've tried worked!

1. Add the WebUpd8 PPA and install the latest Gnome2 Globalmenu, use the following commands:
sudo add-apt-repository ppa:nilarimogard/webupd8
sudo apt-get update
sudo apt-get install gnome-globalmenu

Or use Y PPA Manager to add the PPA :)

2. Restart the computer. Do not just log out - that won't work. And finally, right click the Gnome Panel, select "Add to panel" and add "Global Menu Panel Applet".


For older Ubuntu versions, you can use the Gnome2 Globalmenu PPA.