Powered By

Powered by Blogger

Sabtu, 31 Juli 2010

Elegant Gnome (Theme) Pack PPA For Ubuntu And Linux Mint Users

Elegant gnome
(The dock icons come with Elegant Gnome)


Elegant Gnome Pack is an amazing theme pack we included in a post on 5 great Gnome themes last week so you're probably already familiar with it.


Since then, it got a few update which fix some bugs as well as other optimizations. But the big news for Ubuntu and Linux Mint users is that now you can install Elegant Gnome Pack (actually the installer) from a PPA (10.04 only!).


Important: version 0.4.0 is INCOMPATIBLE with older versions of the script, so remove the previous installation of the script, before installing this version.


The Elegant Gnome PPA comes with 2 Elegant Gnome configuration tool versions: for Ubuntu and for Linux Mint users. To add the PPA and install Elegant Gnome configuration tool in Ubuntu 10.04 / Linux Mint, paste the following commands in a terminal:

sudo add-apt-repository ppa:elegant-gnome/ppa
sudo apt-get update
sudo apt-get install elegant-gnome

You'll also need the latest Equinox Engine which you can install from the following PPA:
sudo add-apt-repository ppa:elementaryart/ppa
sudo apt-get update
sudo apt-get install gtk2-engines-equinox

One more required package is the Droid font:
sudo apt-get install ttf-droid

Once installed, go to Applications > Accessories > Elegant Gnome. Then select to install the theme pack and select OK:

elegant gnome


As you can see, there's also an option to install a Pidgin theme as well as restore the previous settings.


Note: Nautilus Elementary is strongly recommended! Also, if you're not using Ubuntu Lucid or Maverick, you'll also need the latest Murrine Engine - it can be found in the same PPA as the Equinox Engine we wrote about above.


If you're not using Ubuntu or just don't want to add the PPA, you can download the Elegant Gnome Pack configuration tool via Gnome-Look. Here you'll also find some additional info on tweaking Firefox, Openoffice and more.

Cardapio (Application Menu) Gets A System Menu, New Plugins

cardapio

Cardapio is a simple menu for the GNOME desktop that can work in two modes: as a standard menu - applet on the GNOME panel or as a stand-alone launcher (which you can use to launch it from any Dock or panel).


The latest Cardapio 0.9.132 was released earlier today, bringing a system menu - something a lot of us were missing in Cardapio. The new version also comes with some new web search plugins for Bing, Yahoo, Wikipedia and Youtube.


Install Cardapio in Ubuntu


The 32bit version is not ready yet - it's in the Launchpad queue for a day and it hasn't been built yet. But you can install an older version (if you're not using Cardapio already) and wait for the Update. If you're using Ubuntu 64bit then you're in luck - the 64bit Cardapio package is ready.

To add the Cardapio plugin and install it, use the following commands:
sudo add-apt-repository ppa:cardapio-team/unstable
sudo apt-get update
sudo apt-get install cardapio

Then simply right click the GNOME panel, select "Add to panel" and add Cardapio.


To use Cardapio with Docky, Avant Window Navigator or Cairo Dock (or basically any dock out there), see our post: How To Use Cardapio Menu With Docky And Avant Window Navigator.

Pinguy OS (Remastered Ubuntu) - Ubuntu After A Week Of Customizations [Review]

Pinguy OS

Like we promised last week, here is another Ubuntu based Linux distribution (actually a remastered Ubuntu) review: Pinguy OS, which is very similar in concept to Manhattan OS.


Pinguy OS is a remastered Ubuntu with a lot of useful default applications - great for those who don't like to do a lot of tweaking and want an OS that "just works". Pinguy OS doesn't rebrand Ubuntu, so you'll have the same Plymouth theme, the Ubuntu logo for the menu and so on. It's just Ubuntu with a lot of default applications and PPAs enabled by default:

The system was built to have eye candy (CoverGloobus, Gloobus Preview, GNOME Do, Docky) and for every part of it to be user-friendly


You'll probably think you don't need Pinguy since there's already Linux Mint which does a great job at enhancing Ubuntu, but you'll notice a lot more useful stuff in Pinguy OS. And you won't miss Linux Mint either because Pinguy OS comes with the Linux Mint main menu and even the Mint repositories enabled by default.

Yes, maybe you don't like the default applications that come with Pinguy OS and you won't give it a try, but think of the people which actually install all of these applications each time they install / reinstall / upgrade Ubuntu - this should save them a lot of time!


To get an idea of what Pinguy OS looks and the applications it comes with, I've recorded a screencast (in Virtualbox, so ignore the RAM / CPU usage you see in Conky):


The story


As most people I started using Linux because I was just not happy with Windows and had enough of waiting for Vista. I tried many different distro's but all of them where lacking an overall polished finish or just wouldn't work with my hardware. I did use PCLinuxOS for a while as it was the only one at the time I could get working but never liked it and ended up going back to XP.

I gave up on Linux and just waited for Vista to come out. Once Vista came out most of my hardware didn't work so I decided to give Linux ago again. I started to hear good things about Ubuntu but I could never get it to work in the past so I had my doubts about it working, but to my surprise 7.10 worked with all of my hardware.

My first imprisons of Ubuntu was that it was a half fished OS, it was lacking so much functionality out of the box. After some time I got used to how to use Ubuntu and how to fix problems and get things working, and really started to like using it.

As I am the go to guy for all my friends and family for anything computer related, I started to get them all converted to Ubuntu. Looking back I wish I didn't. It's only when you are getting a few people using it (that think a browser is Google) that you realize that it's just not ready for the everyday Joe.

So I went away and found the most user friendly programs for the tasks they wanted to do. Looked at the way they where using there PC so I could get an idea on how to improve the interface and started building a distro based on Ubuntu. After a couple of months the custom distro was built for the needs of my family and friends (Pinguy OS 8.04).

I carried on updating the Distro every time Ubuntu came out with a new version as it was so much easier to install then installing a fresh copy of Ubuntu for the people got convert.

I kept up-to-date with what was going on in the Linux world with help from this blog and others so I could always stay on-top of the best programs for Ubuntu and incorporate them into the Distro.

I was never planing on releasing this distro, it was only because my distro started to get popular among my friends and I was getting asking why I haven't put it on the web that I decided to release it.


- Antoni Norman, Pinguy OS author


First impressions


Pinguy OS is not for every computer. It doesn't have very high hardware requirements but since it comes with Docky and such, it needs compositing. You can use it with Metacity compositing but for the complete experience you should have a computer capable of running Compiz.

In fact, Pinguy OS comes with 2 Docky instances: one for managing running applications on the bottom and one for easy access to different folders on the left. There's also Gnome Do which starts the first time you boot into Pinguy OS, as well as Webilder which automatically changes your wallpaper so if you don't like the default wallpaper - don't worry, it will change in a few minutes.


Even though Pinguy OS keeps the Ubuntu brand, the GDM theme has been changed to match the rest of the desktop:

pinguy os gdm theme


Maybe there are a few applications you use which don't come by default in Pinguy OS - but that should be no problem for those who are used to Linux. However, if you want to install Ubuntu for a friend, why use the default Ubuntu when there are other possibilities like Pinguy OS which might make the person you're installing it for actually use it. This is something which Ubuntu and all major distros forget: you're supposed to build it for every user, not only for technical users. I commented on a WebUpd8 post a while back that I've tried converting some friends to Ubuntu and failed. Now, there could be many reasons for this, but Ubuntu (and this is not just about Ubuntu, other distros can be include here) is just not 100% ready yet for the masses: it's going to take a long time for a n00b to understand how Linux works and how to install stuff, so you'd better make sure he already has everything he may need installed by default or else he may never want to try Linux again. Don't get me wrong, I love Ubuntu, but for example what would my mother do with the default Ubuntu install? No music, videos, Skype and all that... try explaining to a non technical person how to install stuff, enable repositories and so on and they will think you're mad =) .


Pinguy OS


But back to Pinguy OS - Antoni (the Pinguy OS author) takes care of every detail: you get thumbnails for your music and images in Nautilus (thanks to Cover Thumbnailer), Conky comes enabled by default so the user doesn't have to tweak it manually and who doesn't love his Conky?

The modified Elementary theme and icons give a nice touch to the whole desktop - much better in my opinion than Ubuntu's default Light Themes and Nautilus Elementary give even more class to the default look of Pinguy OS.


Default applications


Pinguy OS comes with a lot of applications we've posted on WebUpd8. To name just a few: Nautilus Elementary, Docky, Gnome DO, Gloobus Preview, Cover Gloobus, Conky, Activity Journal (with Zeitgeist), the Sezen applet, VLC 1.1.0, Rapid Photo Downloader, Ailurus, Ubuntu Tweak, Bleachbit, Open Shot, GDM2Setup, MintMenu and so on.

Pinguy OS also replaces some of the default applications in Ubuntu with other more popular apps, such as Thunderbird instead of Evolution and also adds restricted packages like Skype, codecs and java - all by default.

A list of applications Pinguy OS comes with can be found in its post @ Ubuntuforums.


Download Pinguy OS


If you usually install a lot of applications when you first install Ubuntu, why not use Pinguy OS instead?


Pinguy OS comes with both 32bit and 64bit ISOs and can be downloaded from its website.


Alternative downloads and more info @ Ubuntuforums | Pinguy OS Facebook fan page.

Improve Your Netbook Performance And Increase Battery Life By Moving Log And Temp Files To RAM

Fewt, the author of Jupiter and member of the Aurora OS (ex Eeebuntu) core team has a really interesting post on his blog about improving your netbook's performance but also increasing the battery life by moving the temp and log files to RAM using tmpfs.

This is achievable by simply editing the fstab file - you'll basically mount 3 folders in your RAM. Of course, since these files will be saved in the RAM, they will be deleted upon restart but usually you don't need these files anyway.

Fewt's post also includes tweaking Firefox to use the RAM tmpfs for the temporarily files which will make Firefox a lot snappier.


Note: this will of course also works for laptops and even desktops (but obviously, you'll only get a performance boost, there's no battery life to improve for a desktop).


Head over to Fewt for the complete how-to.

Jumat, 30 Juli 2010

Conky Colors Makes Your Conky Beautiful In Seconds (Version 3.20 Released)

Conky colors

Conky is a free, light-weight system monitor for X, that displays any information on your desktop. You've seen it in many screenshots under various forms; take a look at these screenshots if you don't know what Conky is.

A while back we told you about a really easy way to configure Conky using a GUI called ConkyWizard - which is very nice, but it doesn't come with plugins and too many options. Conky Colors on the other hand doesn't come with a GUI but is just as easy to set up (from the command line) and it comes with A LOT of options and scripts (from Gmail to Rhythmbox, weather and more) so you can create an amazing looking Conky in a matter of seconds (don't let our long guide fool you - you just have to install a few packages and run Conky Colors). You can view a list of options supported by Conky Colors, here.

A new Conky Colors version was released today which doesn't brings many new features - but I found this a good opportunity to talk about it since I absolutely love this script.


The new Conky Colors (3.20) comes with an CoverGloobus option (--covergloobus), updated scripts, improved conkyPhoto and conkyPhotoRandom scripts and some other small changes.


How to set up and use Conky Colors in Ubuntu


1. 


For Ubuntu 10.04 or older only: Add the Conky PPA
sudo add-apt-repository ppa:norsetto/ppa
sudo apt-get update
Important: If you're using Ubuntu 10.10, DO NOT add the above PPA or Conky Colors will not work properly!


For any Ubuntu version:
sudo apt-get install conky-all


2. Install other required packages

You'll also need the following packages:
sudo apt-get install python-statgrab ttf-droid curl
Optional: if you want Conky to display your CPU / motherboard temperatures and hard disk, also install lm-sensors and hddtemp:
sudo apt-get install lm-sensors hddtemp
Now you need to configure lm-sensors. Run this in a terminal:
sudo sensors-detect
Then enter "y" for everything and run this to start the sensors:
sudo /etc/init.d/module-init-tools start
For hddtemp to work in Ubuntu 10.04, you need to run this command:
sudo chmod u+s /usr/sbin/hddtemp
And then reboot.


3. Download Conky Colors


4. Configure Conky Colors

a) Extract the downloaded archive (from step 3), use a terminal to navigate to the folder where you extracted it and run:
make
b) Now to see all the available options, use the following command:
./conky-colors --help
Then to set up everything, simply run "./conky-colors" followed by the options you want. Here is an example:
./conky-colors --lang=english --theme=ambiance --cpu=2 --cputemp --swap --updates --hdtemp1=sda --proc=3 --clock=modern --nvidia --calendar --m --network --rhythmbox=case --ubuntu
I used the command above to get Conky the way it looks in the screenshot in the beginning of the post.
There are many options available such as themes, Gmail, Rhythmbox (or other music players) plugins, network info, hard drive temperatures, available / used disk space, display images, weather, todo lists, battery status and lots more - like I said, to see them all, use "./conky-colors --help".
c) Once you are done, run the following command:
make install
d) Try it out. Run conky by pressing Alt + F2 and then type "conky" or type "conky" into a terminal. To close conky, if you run it from a terminal press Ctrl + C or type "killall conky".
4. Put Conky in your Startup applications

To run Conky when your computer starts, go to System > Preferences > Startup Applications, add a new startup application and under "Name" enter "conky" and under command, enter "~/.conkycolors/bin/conkyStart"

Synergy+: Control Multiple Computers With A Single Mouse And Keyboard [Windows, Linux, Mac OSX]

synergy+

With Synergy+, you can share a single mouse and keyboard between multiple computers (and operating systems, as Synergy+ works on Linux, Windows and Mac OSX) using only a LAN connection. The applications should be really useful for users with multiple computers.


WebUpd8 reader Stuart Zurcher writes:

I use it with my desktop (Manhattan OS) and laptop (Windows 7 due to edu requirements) to provide more screen space or to be able to use my desktop keyboard and mouse on the laptop. It takes a little configuration to make work but is really handy. Also works great for copying from one system to the other.

Why "Synergy+"? Because this is a maintenance fork of the original Synergy for which the development stopped in 2006. Synergy+ adds lots of important bug fixes, support for Windows services on Vista and Windows 7 and a new GUI.


Synergy+ main features include:
  • Move your mouse easily between computers
  • Requires nothing other than existing ethernet
  • Copy and paste between your computers
  • No need to press any buttons (unlike KVM)
  • You can still use multiple monitors on the same computer
  • Lock the mouse to one screen temporarily (useful for games)

Using Synergy+

Synergy+ comes with a client and server. To see all the available options, open a terminal and type:

-for the client:
synergyc --help

-for the server:
synergys --help

Note that on Linux and Mac OSX, you'll have to create a config file.

For more info and how to use, see the Synergy Plus wiki page.

Install Synergy+ In Ubuntu

There is a PPA available for Ubuntu users (Jaunty, Karmic and Maverick) so to install Synergy+, simply paste the following commands in a terminal:
sudo add-apt-repository ppa:northern-lights/synergy-plus
sudo apt-get update
sudo apt-get install synergy-plus

Important: as you can see, there's no package in the above PPA for Ubuntu 10.04 Lucid Lynx users. You will find 32bit and 64bit .deb files which will work in Ubuntu 10.04 Lucid Lynx @ Synergy+ download page (link below)!


Download Synergy+ (includes Windows .exe, Mac OSX .dmg, Linux .deb and .rpm and source files)


Image credits: deskography.org; Thanks to Stuart Zurcher for the tip!

Kamis, 29 Juli 2010

Fix Compiz Slowness For Proprietary ATI Drivers In Ubuntu

If you're using the proprietary ATI graphics drivers and you're experiencing really slow maximizing / unmaximization of windows or slow Alt + Tab with desktop effects (Compiz) enabled, here is a PPA which is supposed to fix this for you. The package in the PPA should solve this for both GNOME and KDE users.


Some more detailed symptoms of this bug:
  • Window Management: Unminimizing, Maximising, Full-Screening, Resizing windows and Switching windows (Alt+Tab) will noticeably freeze the screen for about 1 second plus. Your mileage might vary.
  • Memory (RAM) Management: Secondary problem you might notice is memory leak and/or memory-clearing problem


To fix this (important: I didn't test this as I don't have an ATI graphics card!) in Ubuntu / Kubuntu 10.04 Lucid Lynx, use the following commands in a terminal:

sudo add-apt-repository ppa:info-g-com/xserver-xorg-1.7.6-gc
sudo apt-get update
sudo apt-get dist-upgrade


Then you'll have to restart X so log out and log back in!


There is also a PPA for Ubuntu 9.10 Karmic Koala users, but that's not as easy to install as the above PPA: you'll have to force the xorg-server package in Synaptic to version "1.6.4-2ubuntu4.2+backclear1".


Did you try this? If so, did you notice any improvements? Let us know in the comments!


[via reddit | the bug]

"TestDrive" The Latest Daily Ubuntu Development Build With A Click (Now With A GUI)

TestDrive is an Ubuntu application that is especially designed for non-technical users to easily download and run the latest Ubuntu development daily snapshot in a virtual machine. TestDrive also works for other Ubuntu flavours such as Kubuntu or Xubuntu.

You don't have to do anything, TestDrive will even handle the ISO download and later sync it (the first time you download an ISO it is fully downloaded but then the ISO can be synced using zsync so you won't have to download the whole ISO each time you want download the latest version). We already talked about TestDrive a while back so head over to that post for more info on TestDrive.


TestDrive used to be a command-line only application which is not exactly newbie friendly so a GUI was created (not yet fully ready - in fact it's quite ugly for now, but it works!). I wanted to post it a long time ago, but it just wouldn't work (for me anyway) but a recent update finally got TestDrive working so it should now work for everyone.

testdrive - select vm

Since TestDrive now comes with a GUI, you don't have to edit a config file to use VirtualBox with TestDrive, select the virtual disk size or memory and so on - all of these are now available in the new GUI.


Beside the GUI, TestDrive also got a cool new feature: it can now run any Linux distribution ISO in a virtual machine. Simply go to File > New, then type a description, the ISO URL and the sync protocol (I suggest you choose zsync or rsync - but make sure that whatever you choose here is installed).


The first time you run TestDrive GTK Front-end (Applications > System Tools), you'll have to select an Ubuntu flavor / ISO (like Ubuntu Desktop) and then click on "Sync" - this will download the latest daily ISO:

Testdrive gtk front-end

Once the download is over, simply click on "Launch" and you'll have a working Ubuntu development (daily) build in a virtual machine:

Testdrive gtk front-end


Install TestDrive and TestDrive GTK Front-End in Ubuntu

If you're running the latest Ubuntu 10.10 Maverick Meerkat, the latest TestDrive as well as its GTK front-end are already in the repositories so you can skip adding the PPAs below.

To install both the command line version (required) and the TestDrive GTK front-end (GUI), you'll have to add 2 PPAs (Ubuntu 10.04 Lucid Lynx only):
sudo add-apt-repository ppa:testdrive/ppa
sudo add-apt-repository ppa:testdrive-gtk/ppa

Then, to install TestDrive (and the GTK front-end), use the following commands in a terminal:
sudo apt-get update
sudo apt-get install testdrive testdrive-gtk

Cairo Dock (Glx Dock) 2.2 Beta Officially Released With Lots Of Cool New Features


The first official beta of Cairo Dock (GLX Dock) 2.2 was released with a huge list of new features and improvements - we already posted most of them on WebUpd8, but we'll do a small recap. If you're using the Cairo Dock weekly PPA, you already have all these features. But maybe you're not aware of some of them, so read on!

Even though the version in the Cairo Dock (now GLX-Dock) weekly PPA is beta 3, this is actually the first official beta of Cairo Dock 2.2 as announced by Fabounet (the main Cairo Dock developer).


What's new in Cairo Dock (GLX Dock) 2.2 beta


2 new autohide modes have been added to Cairo Dock 2.2: "hide whenever the dock overlaps the active window" and "hide whenever the dock overlaps any window". You can use this with animations such as move-down, semi-transparent or fade-out.

These 2 new autohide modes are really smart too: if for instance someone talks to you in Pidgin, the Pidgin icon becomes visible even though the dock is hidden.


cairo dock glx dock 2.2 beta

Another important new feature in Cairo Dock 2.2 is the integration of the Me Menu and Messaging Menu applets. Besides this, Cairo Dock can now be used in a panel mode so you can easily replace the Gnome panels with Cairo Dock. Further more, you can now run multiple instances of Cairo Dock (so you can have multiple docks / panels).


Other small enhancements: all the themes have been polished, you can now manage tasks in the Clock's calendar, use tiny URLs in the Drop-and-Share applet, the Dustbin applet handles all the drives and many more.


Install GLX Dock / Cairo Dock 2.2 beta in Ubuntu


To install Cairo Dock 2.2. beta in Ubuntu, simply copy/paste the following commands in a temrinal (see the commands for your Ubuntu version):

For Ubuntu 9.10 Karmic Koala or Ubuntu 10.04 Lucid Lynx:
sudo add-apt-repository ppa:cairo-dock-team/weekly
sudo apt-get update
sudo apt-get install cairo-dock cairo-dock-plug-ins

For Ubuntu 8.04 and 9.04:
echo "deb http://ppa.launchpad.net/cairo-dock-team/weekly/ubuntu $(lsb_release -sc) main ## Cairo-Dock-PPA-Weekly" | sudo tee -a /etc/apt/sources.list
sudo apt-key adv --keyserver keyserver.ubuntu.com --recv-keys E80D6BF5
sudo apt-get update
sudo apt-get install cairo-dock cairo-dock-plug-ins


Note: the video in this post only shows a few of the new features in Cairo Dock 2.2 as well as some older features overview! Try out Cairo Dock 2.2 for yourself to see all the new features in action!


More info and a couple more videos @ Glx-Dock.org

New GNOME Shell Mockups Look Like Unity, Nautilus Elementary


Since GNOME 3.0 has been delayed until March, 2011, it seems there's enough time to rethink the way GNOME Shell looks, especially since a lot of people don't like it (especially from the usability point of view).

Some new GNOME Shell mockups were uploaded to GIT recently, showing a lot of similarities with Ubuntu / UNE:


Gedit / Nautilus:

Gedit and Nautilus - GNOME Shell


A closer look at Nautilus:

Nautilus GNOME Shell Mockup

As you can see, Nautilus looks a lot like Nautilus Elementary. We already talked about this, but this is the first mockup of the new default Nautilus which Elementary bits and pieces.


Then there's a new GNOME Shell look which looks incredibly close to Ubuntu's Unity:

GNOME Shell

GNOME Shell workspace


Even the Search seems to be inspired by Unity's Dash:

Gnome SHELL search mockup


I don't know about you, but for me a GNOME Shell like in these mockups is definitely more usable than how Shell is right now. If we can get a usable working GNOME 3.0, it doesn't really matter who inspired who!


What do you think?


In case you don't know how Nautilus Elementary / Unity look like, I suggest you see these:

Kubuntu Netbook (10.10) Application Menu ("Global Menu") Is Finally Ready!

appmenu kubuntu 10.10


Kubuntu Netbook (10.10) finally got its application menu integration ready yesterday (turned off panel auto-hiding by default).

As you can see in the screenshot, it's not exactly the same like on Ubuntu Netbook Edition 10.10 maverick Meerkat, but it's built on the same technologies.

The Kubuntu Nebtook "global menu" also works with GTK/GNOME applications (but for now you'll have to install some additional packages for this):

Kubuntu netbook application menu
The GIMP application menu in Kubuntu Netbook 10.10


Of course, just like it is with the UNE application menu, the Kubuntu Netbook appmenu also has some bugs so if you plan on testing it, don't forget to submit any bugs you may encounter!


And some old news we didn't post on WebUpd8 (but we shared it on Twitter / Facebook / Google Buzz): Kubuntu Netbook Edition 10.10 is dead. There won't be an Kubuntu Netbook Edition 10.10 Maverick Meerkat ISO, and instead the Plasma Netbook has been added to the standard Kubuntu desktop ISO with some detection to select Desktop or Netbook based on the screen size. More on this, here.


Image credits: skitterman.wordpress.com / News via the Ayatana mailing list.

Pithos 0.2.0 Released With Indicator Applet Support (Pandora.com Linux Client)

Pithos

Back in Februrary we were telling you about Pithos, a pandora.com Linux client which supports switching between stations, cover art, proxy and more. Pithos wasn't updated in a while but today a new Pithos (0.2.0) version has been uploaded to the Pithos PPA. Pithos 0.2.0 doesn't come with huge changes, just a lot of bug fixes (such as fixing fetching the cover art when behind a proxy), some tweaks to the user interface, bigger cover art and more.

The new Pithos 0.2.0 also comes with indicator applet support and a monochrome icon by default which you can use to love/ban/tired the current song as well as pause / skip:


Pithos indicator applet


Install Pithos 0.2.0 in Ubuntu

To install Pithos in Ubuntu (currently only for Ubuntu 9.10 Karmic Koala and Ubuntu 10.04 Lucid Lynx), simply paste the following commands in a terminal:
sudo add-apt-repository ppa:kevin-mehall/pithos-daily
sudo apt-get update
sudo apt-get install pithos

In case you're not living in the US and want to listen to Pandora using Pithos anyway, see: Listen to Pandora And Spotify Outside US / UK In Linux, Using TOR (With Country Specific Exit Nodes)


Thanks to Kevin McDole for the tip!

Rabu, 28 Juli 2010

GNOME 3.0 (Which Will Include GNOME Shell) Delayed For 6 Months

GNOME Shell

GNOME 3.0 which is supposed to include the new GNOME Shell as well as GTK 3.0 has been delayed for 6 months to March, 2011.

The decision was taken at the GUADEC conference:

We could release in September and have something working that is okayish, but it's not up to the standards we have.

says Vincent Untz, release team member.


Among the options discussed were the release of GNOME 3.0 with the classic 2.x user interface or to release GNOME 2.32 as a new stable release instead of 3.0 for now - this second option being the decision which everybody seems to agree on.


That means GNOME Shell won't be default in Ubuntu 11.04 so the first Ubuntu version which might get Shell by default is 11.10.


You can read more about it @ http://derstandard.at/


GNOME Shell was voted the second most awaited Linux project of the year by the WebUpd8 readers.

Jupiter Ubuntu PPA (Hardware And Power Management Applet For Netbooks And Laptops)

jupiter ubuntu

A while back we told you about Jupiter, an application created by Fewt for Aurora OS (ex Eeebuntu) (but also works in other Linux distributions) which can be used to switch between maximum and high performance and power saving mode, change the resolution and orientation, enable or disable the bluetooth, touchpad, WiFi and so on. But most importantly it allows your Eeepc netbook to take advantage of SHE (Super Hybrid Engine).

Jupiter is not just for EeePC, it also works on other netbooks or laptops. Read our Jupiter review for more info.

Since Jupiter can only be downloaded by Ubuntu users via Sourceforge, we've created a PPA for Ubuntu Karmic, Lucid and Maverick users so they can stay up to date with the latest Jupiter packages.


Before installing, please note that Jupiter is only supported for Aurora and Fedora. So use it in Ubuntu at your own risk!

Add the Jupiter PPA and install it in Ubuntu 9.10 Karmic Koala, 10.04 Lucid Lynx or 10.10 Maverick Meerkat

1. Add the Jupiter PPA:
sudo add-apt-repository ppa:webupd8team/jupiter
sudo apt-get update

2. Install Jupiter

a) The main Jupiter package - works on any netbooks:
sudo apt-get install jupiter

b) Support for EeePC - required for SHE (Super Hybrid Engine)
sudo apt-get install jupiter-support-eee

Selasa, 27 Juli 2010

Download The Microsoft Windows Vista Fonts In Linux Using A Script

consolas font linux

I've came across many blog or forum posts where people say they like the Microsoft Windows Vista fonts and use them in Linux. I don't find anything special with any of those fonts but maybe you do. If so, read on!

I can't legally put these fonts for download here, but I found a script which extracts the Windows Vista fonts from PowerPointViewer.exe, directly from the Microsoft website.

To download (extract) all the Windows Vista fonts and install them in Linux, simply run the following commands in a terminal:
wget http://plasmasturm.org/code/vistafonts-installer/vistafonts-installer
chmod +x vistafonts-installer
./vistafonts-installer

Of course, before running the script, you may want to take a look at the code.


Among the fonts the above scripts installs are: Calibri and Consolas but not the Segoe UI font. If you really want the Segoe UI Vista font too, download this Vista transformation pack, extract it and you'll find Segoe UI under vista > font.

Ubuntu Software Center (2.1.6) Gets Yet Another Slight Redesign

Ubuntu Software Center 2.1.6

A new Ubuntu Software Center version (2.1.6) was just released in Ubuntu 10.10 Maverick Meerkat which brings some more design changes: everything in the main view is now more compact and there are no more borders separating the categories ("Departements") from the featured applications or "What's new".

The new Software Center also finally displays some applications under the "What's new" category - this category is supposed to hold the new applications in the extras.ubuntu.com repository but for now I don't yet understand on what criteria the applications show up under this category.


ubuntu software center maverick meerkat

And finally: the "Installed Software" now lists all the PPAs you have from which you've actually installed some applications and only the installed packages are displayed for each PPA (but all the packages and PPAs are listed under "Get Software").


The complete changelog for Ubuntu Software Center 2.1.6 can be found here.

Download All The Official Ubuntu And Most Fedora Wallpapers

Anchor Schmidt @ Ubuntuforums created a pack with all the official Ubuntu wallpapers and the Fedora wallpapers from Fedora Core 5 onwards. The wallpaper pack only includes the wallpapers which were default in each Ubuntu / Fedora version, and not the extra wallpapers. The wallpapers are available both for widescreen and 4:3 formats.


There is a video with all these wallpapers, which you can watch below:


I didn't make the video so if you don't like the slideshow transitions, don't blame it on me =)


Download the Ubuntu / Fedora wallpaper pack: Mirror 1 | Mirror 2


Thanks to Anchor Schmidt

Minitube 1.1 Released - Upgrade To Get It Working Again

Minitube 1.1

Minitube is a native YouTube client for Windows (soon), Linux and Mac OS X. With it you can watch YouTube videos in a new way: you type a keyword, Minitube gives you an endless video stream. Minitube does not require the Flash Player.

Like we told you a few days ago, YouTube changed something which broke all the applications for downloading or playing YouTube videos. This includes VLC 1.1.1, youtube-dl and of course, Minitube.

This is why a new Minitube version was released today so if you want a working Minitube, you'll have to install the latest 1.1.


Besides fixing the YouTube issue, Minitube 1.1 also comes with a toolbar restyling and fixes moving more than one video down or up in the playlist.


Ubuntu 9.10 Karmic Koala, 10.04 Lucid Lynx and 10.10 Maverick Meerkat users can install Minitube 1.1 from the WebUpd8 PPA:
sudo add-apt-repository ppa:nilarimogard/webupd8
sudo apt-get update
sudo apt-get install minitube

Or you can manually download the Ubuntu .deb files.

Download Minitube 1.1 for other Linux distributions and Mac OS X

Senin, 26 Juli 2010

Get Notified When A Job You Run In A Terminal Is Done, Using NotifyOSD [Ubuntu]

notifyosd terminal notification

Dustin Kirkland, Core Developer of the Ubuntu Server posted something very interesting on his blog: an alias you can add to your .bashrc file to get notified when a job you run in a terminal is done. A simple solution for something I've been looking for in a long time.

Getting notified when the job you're running in the terminal is done can be very useful since when you compile something or run some other time consuming task, you usually don't care what's going on inside the terminal  until whatever you were running is done, right? So you switch to some other window(s) meaning you have to constantly keep checking the terminal window to see when it's done. And that's not exactly productive. Further more, you may occasionally forget you were running something in the terminal.

Dustin's simple alias makes it very easy to get a notification bubble (using NotifyOSD) when the job you're running in the terminal is done.

Setting everything up

1. To use it, simply edit your ~/.bashrc file:

gedit ~/.bashrc

and paste this at the end of the file:
alias alert_helper='history|tail -n1|sed -e "s/^\s*[0-9]\+\s*//" -e "s/;\s*alert$//"'
alias alert='notify-send -i /usr/share/icons/gnome/32x32/apps/gnome-terminal.png "[$?] $(alert_helper)"'

2. Then make sure you have libnotify-bin installed:
sudo apt-get install libnotify-bin

3. Now source your .bashrc:
source ~/.bashrc

Try it out

To get notified when a job you run in a terminal is done, add "; alert" at the end of a command (without the quotes).

As a test command you can run:
sleep 20; alert


Example: If you want to get notified when you compile some program, run the "make" command like this:
make; alert


Many thanks to Dustin Kirkland for the alias!

The Best Linux Main Menu

Another week, another poll. This time you can vote for the best Linux (main) menu. I didn't include all the menus out there in the poll, but there are more options than we usually use for our polls. The contenders are: MintMenu, Lancelot, Main Menu (the main GNOME menu), Slab, Menu bar (the Ubuntu default menu), Kickoff, USP (Ubuntu System Panel), GnoMenu, K-Menu and Cardapio.

As usual, you can vote for something not among the default options by choosing "other" and then entering your answer.


You can vote for the best Linux menu below:


Note: I've added MintMenu even though it's a USP fork and Lancelot which I believe is a Slab fork because they are somewhat different.


Don't forget to tell us why you like a certain Linux menu or suggest some other menus, in the comment form below!

Minggu, 25 Juli 2010

Debreate Helps You Create Debian / Ubuntu Packages (.deb)

debreate

A long time ago we posted a brief how-to on creating Ubuntu / Debian .deb files. If you don't know how to create a .deb file, you still need to read that how-to (I also strongly recommend you read the Debian documentation), but Debreate will help you create debs faster.

Debreate has a field for most of the info in the files that go into the "debian" folder (the "debian" folder is where all the packaging files reside) so it should be both faster and easier to create a Debian package. But like I said, that doesn't mean you can skip reading the documentation.


To understand exactly how Debreate works, here's a quick screencast:


Download Debreate/ (comes in an Ubuntu / Debian .deb) - I recommend downloading version 0.7 even though is still alpha, because it comes with more features (it is marked as "alpha" because not everything planned was implemented in this version).


[via Ubuntips]

Install Zaz (Zuma Like Game For Linux And Windows) 0.8.0 In Ubuntu

zaz 0.8.0

Zaz is a multi-platform (Windows and Linux) arcade action puzzle game where the objective is to get rid of all incoming balls by rearranging their order.


The idea of the game is loosely based on games like Luxor, Zuma and Puzzle Bobble.

Zaz 0.8.0 was released a few days ago, the new version extending the number of levels to 20, added language option in options menu and some other small improvements.


Here is a video with level 20 of Zaz 0.8.0:


The version in Ubuntu is still 0.2.9 in both Lucid and Maverick, so we've uploaded the latest Zaz 0.8.0 in the WebUpd8 PPA, so there are many new levels and features compared to the version in the Ubuntu official repositories.


Install Zaz 0.8.0 in Ubuntu Karmic, Lucid and Maverick

sudo add-apt-repository ppa:nilarimogard/webupd8 && sudo apt-get update
sudo apt-get install zaz

If you don't want to add the WebUpd8 PPA, you can also manually download the .deb files.


Zaz is not a game for passionate gamers but for some ocasional fun. It is actually one of the few games I play when I have some free time and what I can tell you is: be careful, it's very addictive! If you start playing it at work and you get fired for it, don't blame it on me, ok? =)


Download Zaz source or Windows binaries

Last Week's Top Posts (Week 29, 2010)

  1. 7 Of The Best Ubuntu Terminal (Fixed Width) Fonts
  2. 5 Beautiful GNOME (GTK) Themes (New Or Recently Updated)
  3. Thunderbird 3.1.1 Ubuntu PPA Repository [Maverick, Lucid, Karmic, Jaunty and Hardy]
  4. DockBarX 0.39.6 With Easy AWN Integration, AWN Lucido, Sezen Applet, Indicator Keylock Updates [PPA]
  5. VLC Default In Kubuntu 10.10 Maverick Meerkat?
  6. Install 0 A.D. (Age Of Empires Open Source Clone) Pre Alpha 3 In Ubuntu, Now With Multiplayer Support
  7. Download Ubuntu Customization Kit 2.2.1 (Just Released)
  8. Chrome AdBlock Can Now Block Ads Before They Are Downloaded
  9. Cover Thumbnailer 0.8 Released With New Resize Method For Music Folders, Mosaic Mode And More
  10. New Artwork For Lubuntu 10.10 Maverick Meerkat [Screenshots]


Manhattan OS (Based On Ubuntu) Makes It Easier To Convert Users To Linux [Review]

We promised we'll do a Manhattan OS review a long time ago and initially I wanted to wait until the final version comes out but I had some spare time so I decided to do it today.

Manhattan OS is a Linux distribution based on Ubuntu created by Kevin McDole, a frequent WebUpd8 reader and commenter. Manhattan OS is in fact inspired by everything we post here, at WebUpd8. Initially I though this review would be really easy to do since I am very familiar with everything in Manhattan OS, but I then realized half of WebUpd8 is used in Manhattan so that would take like... a year for a full review. So we'll do a light review only and for any application for which you want to find out more, just search for it on WebUpd8.


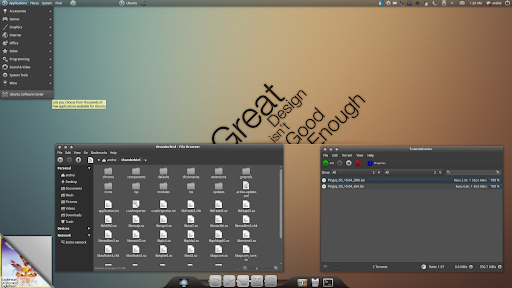
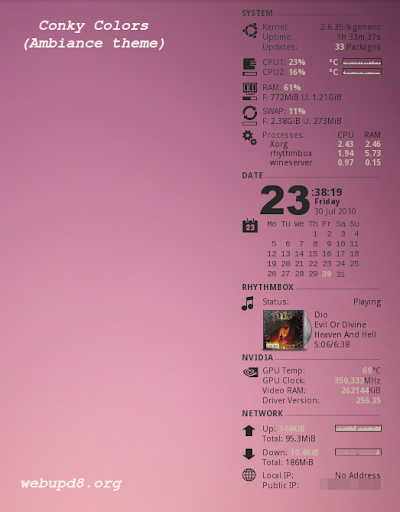
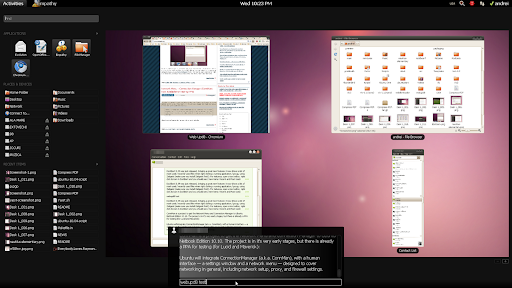
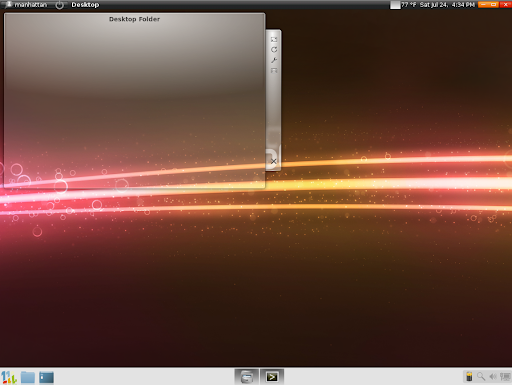
Manhattan OS comes with basically everything you need and looks simply amazing so if you want to convert a friend to Linux, this is the distro you should suggest. Here is a screenshot of what you see the first time you boot into Manhattan OS:

Manhattan OS
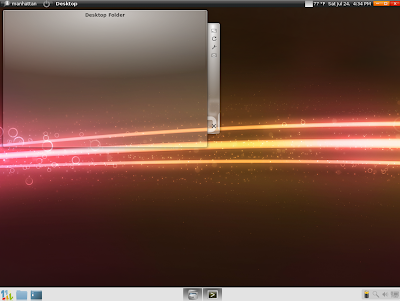
(Manhattan OS without enabling Compiz!)

Sure, if you're a geek who likes to customize and install everything for himself, this may not seem like much but remember that most people never customize anything more than the background so the default application selection and look is very important.


The story


The creation of the OS was a spur of the moment move. I got my first laptop in August of 2009 (a year on August 1st) and randomly decided to move to Linux. I had never used Linux or even heard of it before that. I read about things like Gentoo and I thought it would be a great challenge to start from scratch. If you search on Facebook for the Manhattan OS group (not fan page) you can see some really old screenshots of Manhattan and how it has changed! I originally was only going to give it to my friends, but back then it was primitive and laughable but they all thought it was cool (none of them had Linux experience either). I learned as I created it and eventually people convinced me that it was different enough that I should try and make my own distro.

Manhattan OS has always been about taking the best things from everywhere and combining them into one. Everyone seems to like Gnome (I myself started with KDE but found that the integration between programs was really poor and it was difficult to navigate). I switched to Gnome, liked the Gnome panel, but didn't want to make it exclusive. Actually I had nothing unique until I happened upon a random article... which now seems not so random. It was about the release of AWN 0.3.9, and it was posted on WebUpd8. Nobody else seemed to have an AWN panel, so I went for it. The KDE Plasma widgets seem to be loved by everyone, so I threw those in as well. I really wanted to find a comfortable middle between Windows 7 and OS X, and I think the GUI reflects that, with of course its own 'Manhattan' flavor.

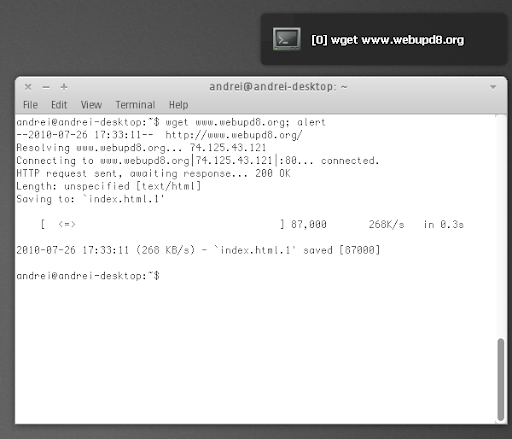
I always say Manhattan could be SO amazing and 1000x better than it is if I only knew of little independent projects that don't get much recognition (such as face recognition login). WebUpd8 have been extremely helpful in raising awareness of such interesting projects, many of which I have incorporated into Manhattan (Nautilus Elementary, the Battery Indicator). I know there are other small projects and great ideas out there waiting to be found.


-The text above is Manhattan's OS story sent to us by Kevin.


First impressions


Firstly, the basics: Manhattan OS is based on Ubuntu 10.04 Lucid Lynx (GNOME), but it also uses the Plasma Desktop (click for how to use KDE Plasma Desktop in GNOME) from KDE. The version which we reviewed (Beta 1) uses Kernel 2.6.32-23 and more up to date packages than in Ubuntu 10.04 Lucid Lynx such as Pidgin 2.7.1, Evolution 2.30 and so on.

As you can notice in the screenshot in the beginning of the post, Manhattan OS comes with Avant Window Navigator with DockBarX for the task manager as a complete bottom panel replacement. Docky fans will probably be a bit dissapointed by this but unfortunately Docky can't fully replace a GNOME panel yet. But they will be glad to know that GNOME Do comes by default and is set up to run at start up.


Manhattan OS Me-Menu
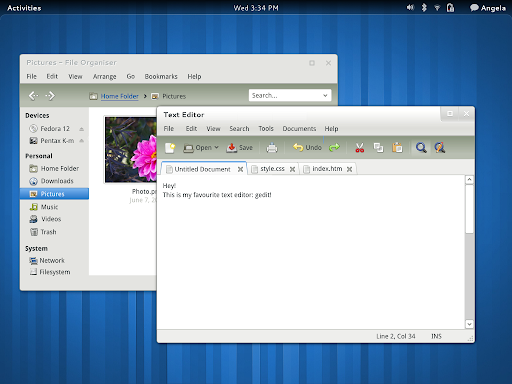
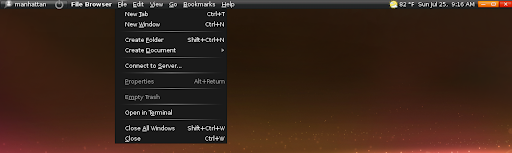
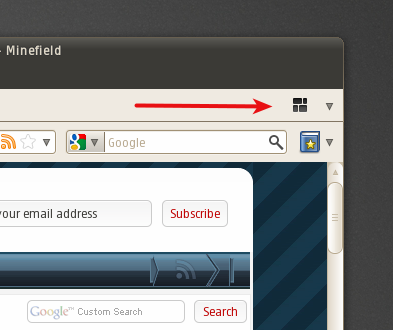
(Manhattan OS - MeMenu)


manhattan os top panel
(Manhattan OS - top panel)

In the top panel you'll notice the MeMenu is placed on the left followed by Global Menu, while on the right there's the very useful Window Applets (the close, minimize and maximize buttons on the panel). On the desktop you can also see Folder View which helps you keep the desktop organized while also brining some more eye-candy to Manhattan OS.
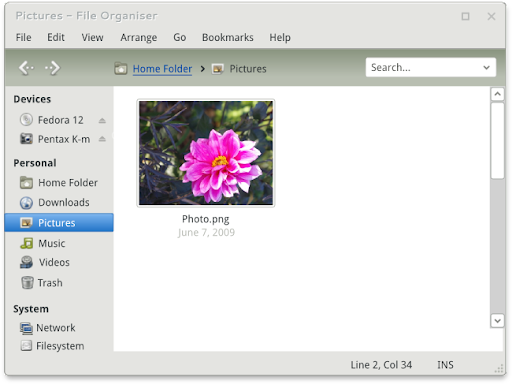
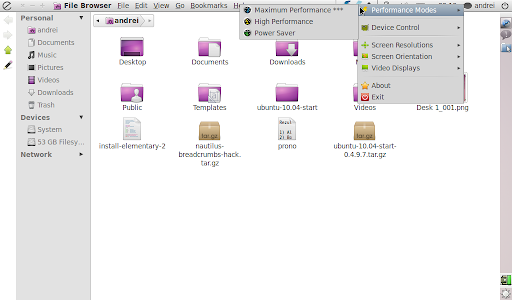
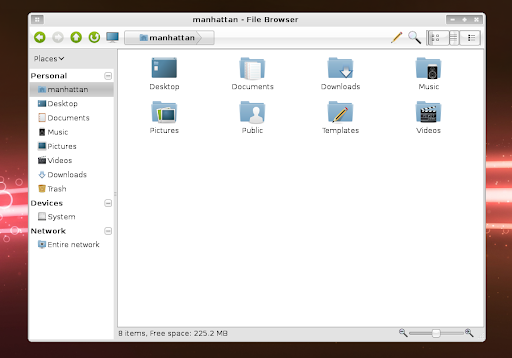

Nautilus Elementary Manhattan OS

For the 
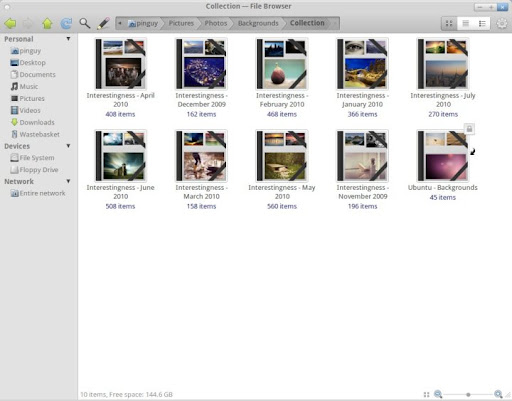
file browser, Manhattan uses everyone's favourite: Nautilus Elementary 2.31.1 with breadcrumbs enabled by default which makes a great first impression for everyone: may they come from Windows or another Linux distribution.


manhattan OS menu

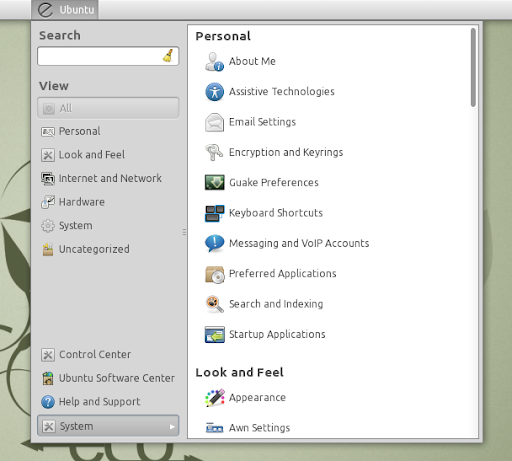
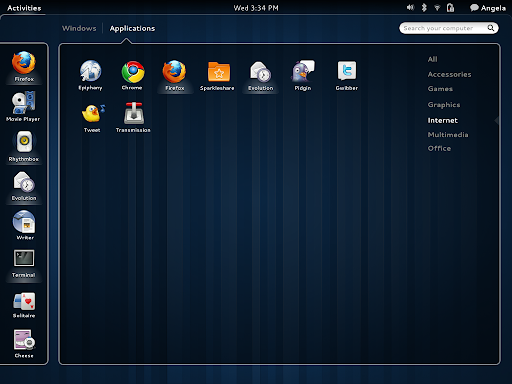
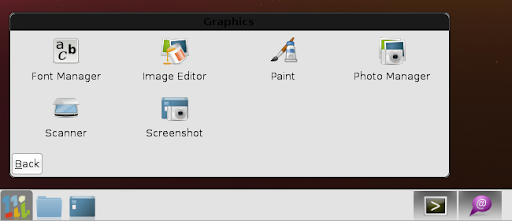
In Manhattan, you don't have a huge list of administration menus. You just get a basic menu in Avant Window Navigator from where you can access the Gnome Control Center which is kind of like the Windows Control Panel so the users coming from Windows won't have a hard time getting used to this. Like I said, this is a great distro to make someone switch to Linux as nothing feels to complicated. Still, for the menu I would have chosen one with a search but Kevin probably waits for a Cardapio Avant Window Navigator native applet.

Also, the most of the application names don't show up in the menu, instead they are displayed like: "Image editor", "Messenger", "BitTorrent", "Photo manager" or "Disk burner" so a new user actually knows what an application does before opening it.

The theme

While the Desktop is drawn by KDE so you can add some Plasma widgets to the Desktop, the windows use a GTK theme called Moomex, with MeliaeSVG icons which will remind you of the Elementary theme, but with a dark panel background.


Detailed application selection


Like I told you, Manhattan comes with many of the applications we've reviewed on WebUpd8, I won't review them again and instead, I'm just going to mention these apps.


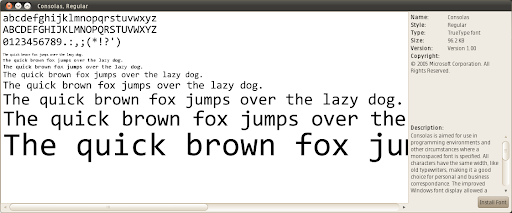
Graphics / media: Some of the default Manhattan OS applications are: Font Manager, for an image editor it comes with both Pinta (for something easier to use) and GIMP 2.7.1 but also F-Spot for a photo manger, 
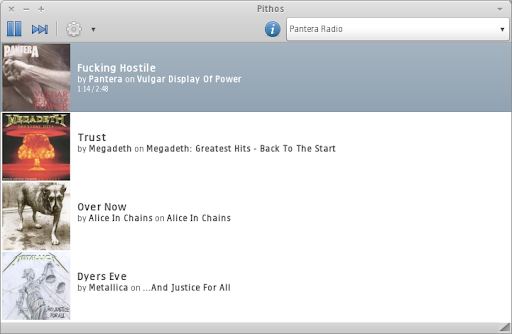
GNOME Scheduler, Brasero for burning CDs and DVDs, Cheese, Rhythmbox, gPodder, Jokosher for a sound editor, Totem, Pitivi for a video editor (here, I don't really understand why OpenShot was not made default) and Moovida Media Center.


Some really interesting picks for default apps are System Wide Pulseaudio Equalizer, Giver - a tiny application I simply love and Deja Dup (backup tool). Once again I see a small Linux distribution coming with a default backup application, yet such a popular distro like Ubuntu lacks in providing the users with such a default tool. This is something very bad for Ubuntu as I see it - if they want to gain some Windows or Mac OSX (just think about Apple's Time Machine), such an application is a must!


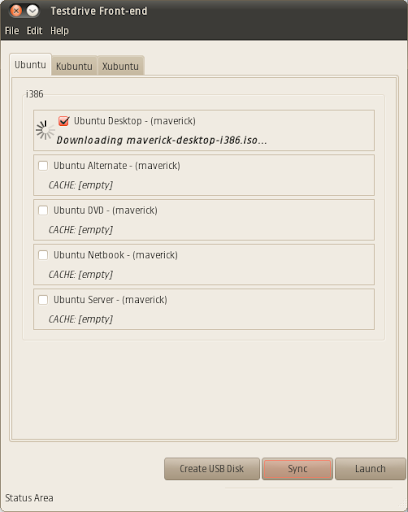
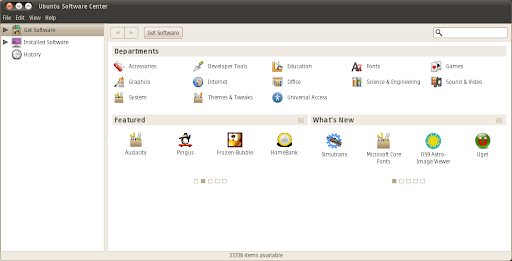
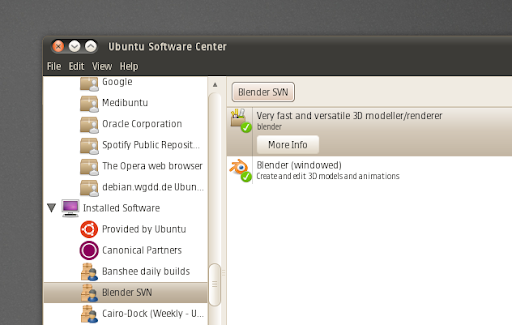
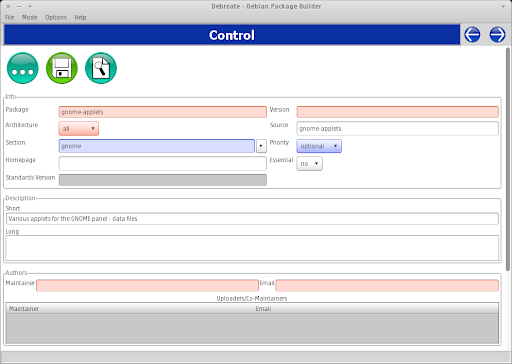
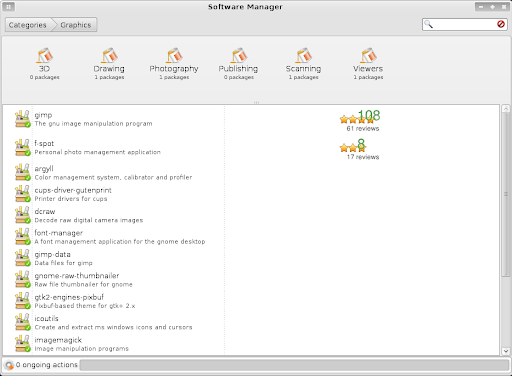
Manhattan OS doesn't uses the Ubuntu Software Center, but something which looks like the Mint Software Manager (I never used that one so I'm not really sure). Here's a screenshot:

Manhattan OS software manager

This seems more advanced than the Ubuntu Software Center in some areas; as you can see, it comes with a review system and is simplified which makes it easier to use.


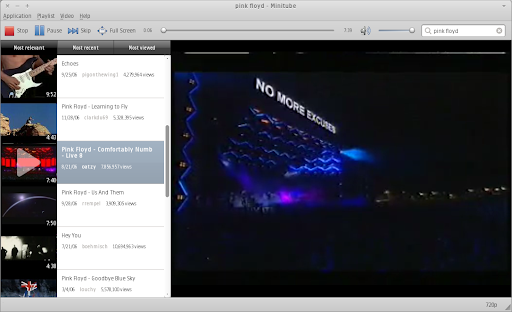
For the Internet, Manhattan OS comes bundled with Google Chrome (that's right, no Firefox), Dropbox, Skype, Gwibber, Deluge as a default bittorrent application, Hulu, Pidgin, Amazon MP3 Downloader, Pandora and some other useful application one might need.


To make it even easier for Windows users to switch to Linux, Manhattan OS comes with IBM's Lotus Symphony as the default office suite for Manhattan OS for better MS Office compatibility plus WINE and PlayOnLinux installed by default.


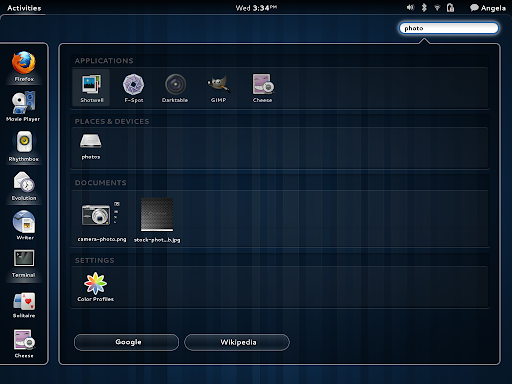
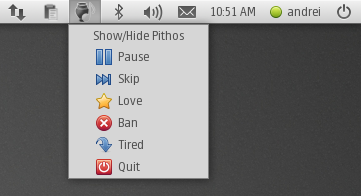
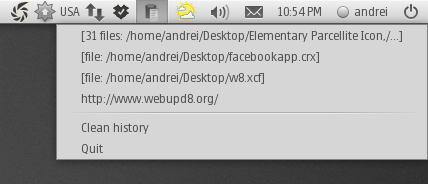
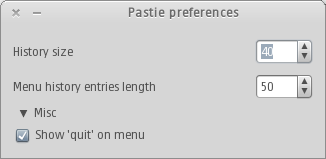
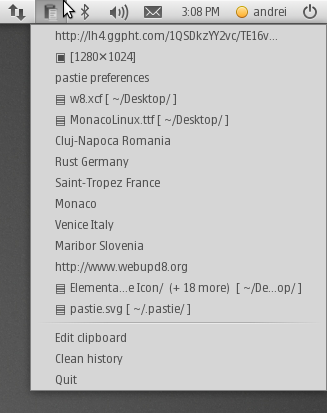
Manhattan also packs some smaller applications which you don't notice at first but which a new user is definitely amazed by such as Gloobus Preview, Zeitgeist or a small but very useful applet: Battery Status.


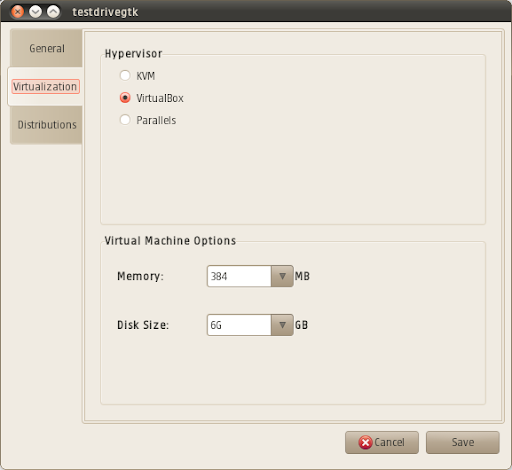
There are a lot of default applications packed in the 1.1 GB Manhattan OS ISO, basically for anything you need: remote desktop client, TV tuner and so on - the best way to try them all is to download and give it a try, it should work in VirtualBox too as long as you have some capable hardware (make sure you enable PAE in VirtualBox to be able to run it). Or just run it off an USB memory stick for the complete experience.


Final thoughts


Manhattan OS is designed for new Linux users. If you're a long time Ubuntu (or any other Linux distro) user, you might not like everything that comes default in Manhattan. But if you want to make someone start using Linux, be it a friend, your mother or whatever, Manhattan's simplicity and good looks (by default) might be the best choice.

A while back I said I tried convincing a lot of people to start using Linux and most of the times I failed. Maybe part of this was because of me, but Ubuntu has its flaws when it comes to new users and what they need in an OS. A Linux distribution like Manhattan might be better for this! Really. And not just for that, if you want to have almost everything that we write about on WebUpd8, but without having to install each and every application manually, Manhattan may just be what you're looking for.


Download Manhattan OS


Like we told you, Manhattan OS is still in beta. But you can already download it from HERE (aprox. 1.1 GB).


Disclaimer: even though we like Kevin, he is just a WebUpd8 reader and we (WebUpd8) have nothing to do with Manhattan OS.


There is one more OS based on what we post on WebUpd8 called Pinguy OS - we'll review it soon too!

Sabtu, 24 Juli 2010

Pastie 0.5.2 (Stable) With Any File Type Copy History Support Now Available In Its PPA [Linux Clipboard Manager]

pastie

Like we told you a while back, Pastie - a simple clipboard manager that makes use of the AppIndicator in Ubuntu - got an amazing new feature: it can now keep track of any file type (including images) as you can see in the screenshot above.

But that was a testing version only, which is now all grown up and available in the Pastie official PPA.


The version in the PPA also fixes an important memory leak bug in the testing version we posted a while back so it's important to upgrade to this version!


Other new features Pastie 0.5.2 (stable) since the last stable version:
  • it's very easy to use a custom icon for Pastie: simply place the icon you want Pastie to use in the ~/.pastie/ folder. The icon must be renamed to "pastie.svg" ("svg" can be any other kind of usable type of image). You can find an Elementary icon here, and mono icons here.
  • you can launch the Pastie preferences dialog using a keyboard shortcut: Ctrl + Alt + P.

pastie preferences


As you can see, there are no new features compared to the testing Pastie 0.5 version, but like I said, it is highly recommended you add the PPA and upgrade to the latest Pastie!


Update: yet another update came to Pastie this morning, modifying the way the files are displayed: the file is now placed at the beginning of the row, with the path following it. Also, the files have an icon so you can easily distinguish between copied files and text:

Pastie

Install Pastie 0.5.2 in Ubuntu 10.04 Lucid Lynx:

sudo add-apt-repository ppa:hel-sheep/pastie && sudo apt-get update
sudo apt-get upgrade
sudo apt-get install pastie

An "apt-get upgrade" is required because the Pastie PPA now comes with an updated indicator-application package which brings some improvements to the memory leak issue in Pastie (which seems to be related to the indicator-application package).

Embed YouTube Videos In HTML5 [New YouTube Embed Code]

This post is mostly for bloggers. Since we're fans of HTML5 (or you could say we hate Flash, it's all the same), we decided to share this with our readers since a lot of them own a blog and this will make their readers happy since they no longer have to watch the embedded YouTube videos in Flash.


An update to the YouTube embed code which uses <iframe> allows your blog readers to view the video in whatever they have set in their YouTube preferences. This means that if they chose to view the videos in HTML5, embedding the videos on your blog / website using the new embed code will show up for them in HTML5 - just as if they were watching the video directly on the YouTube website.

This new YouTube videos embed code is not yet default, so you'll have to insert it manually. This is how the code looks:

<iframe class="youtube-player" type="text/html" width="640" height="385" src="http://www.youtube.com/embed/VIDEO_ID" frameborder="0">
</iframe>

All you have to do is paste the code above in your blog posts and modify the VIDEO_ID with the id of the video you want to post (the video is is the numbers and letters after "watch?v=" in the video URL). You can of course edit the width / height in the code above.

Here is an example of an HTML5 embedded video (it's HTML5 only for those who enabled it):


New Artwork For Lubuntu 10.10 Maverick Meerkat [Screenshots]

In case you don't know, Lubuntu is using LXDE and is designed for computers running old hardware or netbooks.


Lubuntu 10.10 Maverick Meerkat, the unoficial LXDE flavor of Ubuntu got an artwork update last week. I'm posting this only now because I had some issues downloading the latest Lubuntu development ISO.

Almost every element of the Lubuntu arwork was updated: backgrounds (panel and menu), the Openbox theme, Lubuntu menu logo, splash images (LXDM and logout dialog banner) and wallpaper.

There are no changes to the Live CD artwork because these changes are only available for those who are using the Lubuntu Desktop PPA (comes enabled by default in Lubuntu). All these should be available in the next Lubuntu 10.10 Alpha release (Alpha 3).


New Lubuntu (Ubuntu w/ LXDE) 10.10 Maverick Meerkat artwork screenshots


Lubuntu 10.10 LXDM login screen
LXDM login screen


Lubuntu new wallpaper
Lubuntu 10.10 new wallpaper


Logout dialog
Logout dialog


New panel background and menu logo
New panel background and Lubuntu menu logo


Lubuntu new default Openbox theme
The new default Openbox theme

Lubuntu Openbox theme
The new default Openbox theme


The icons didn't change: the Elementary monochrome icons are still default.

The Lubuntu Plymouth theme also remains unchanged for now, but it should soon look to something like this:

Lubuntu 10.10 Plymouth theme (mockup)


If you want to try out the latest Lubuntu 10.10 Maverick Meerkat Alpha 2, download the ISO via Bittorrent.

TabCandy: Taking Firefox Tab Management To A New Level [New Alpha Firefox Feature]

tabcandy firefox linux

For a while I felt like all the Firefox developers do is copy other browsers. But a new feature, currently in Alpha is absolutely impressive. It's not that it hasn't been done by any other browser before, but it's something that will probably revolutionize the browser tab management.

Most people have keep a lot of tabs open in their browser, so something had to be done to improve the way you manage the tabs. This is what TabCandy is here to do: press the button on the top right corner in Firefox or simply hit Ctrl + SPACE and you can then move your tabs to a new group. Clicking the new group will only open those tabs but you won't lose the other tabs: just click Ctrl + SPACE again (or use the built-in button in the upper right corner) and you can use another tab group or delete / create new ones.


Note: to be able to use Ctrl + SPACE, make sure there's nothing else using this keyboard shortcut. If that's already used by some application, just use the button in the upper right Firefox window corner:


tabcandy firefox

And this is just the alpha version - there are a lot of new features to come like searching the tabs, share tab groups with your friends and so much more.


When you first try TabCandy, you'll instantly notice it feels a lot like GNOME Shell (or the Expose effect if you're using OSX). But, unlike GNOME Shell, TabCandy features actually make sense and it's definetly an improvement for those who use a lot of tabs in Firefox. And it's not just great for usability - it looks good too!


But you can't really understand why this is so great until you take a look at the following video:


Or better yet, download it and give it a try for yourself. This is not an extension but a Firefox feature so you'll have do download a special Firefox 4.0 build (available for Windows, Mac OSX and Linux - both 32 and 64 bit). To run it in Linux, simply download the archive, extract it and double click the file called "firefox" (not "firefox-bin"!) - no installation is required.


Note: this only comes in the Firefox 4.0 build linked above and is not available in the Mozilla Daily PPA or the official Firefox 4.0 nightly builds (for now anyway).


Thanks to Download Squad

"Cube 2" Sauerbraten 2010 Update With Two New Player Models, 30 New Maps And More [Quake-Like First Person Shooter]

cube 2 sauerbraten

Cube 2: Sauerbraten is a cross-platform, Quake-like first-person shooter that runs on Linux, Windows and Mac OS X using OpenGL and SDL. The game features single-player and multiplayer gameplay and contains an in-game level editor. The game currently has singleplayer and multiplayer. Multiplayer functionality is possible with LAN, local and online play.


Great news for those of you who like games and don't have anything to do this weekend: yet another game has been updated.

There have been 14 months since the last "Cube 2" Sauerbraten update - a lot of time for some polishing but also many new features. The new version 2010-07-19 "Justice Edition" brings two new player models, 30 new user-created maps, several new game modes (including Efficiency CTF, Efficiency Hold, Efficiency Protect, Hold, and InstaHold), a mini-map, clock and crosshairs and many many more new features which you can read about @ Cube 2 history page.


"Cube 2": Sauerbraten offeres the following gameplay modes: Free-For-All (everyone for themselves, all weapons allowed), InstaGib (deathmatch, rifles only), Capture (where teams fight for control of points on the map, all weapons allowed), Capture the Flag (two teams fight to capture the other's flag and return it to their base), Teamplay (defeat the other team's players to score points for your team), Tactics (FFA, but players spawn with random equipment), Efficiency (FFA, but players spawn with all equipment) and Protect (teams try to touch each others' flag). Insta, regenerative weapons ("regen") or Teamplay versions of some of the game modes are available, as well as cooperative map editing, even online—one of Cube 2's most interesting and popular features. You can of course also play Cube 2 in single player mode: both in an episodic gameplay or deathmatches on multiplayer maps against AI bots.


How to run "Cube 2": Sauerbraten on Linux


"Cube 2": Sauerbraten does not require any kind of installation under Linux. All you have to do is download the Linux version, extract the archive and then double click the "sauerbraten_unix" file (don't try to run it directly from the "bin" folder - that won't work!).


Download

Download Cube 2: Sauerbraten "Justice Edition" for Linux, Windows and Mac OSX


Via Phoronix; Some info via Wikipedia